Showing posts with label Food. Show all posts

Wednesday, December 23, 2015

iced over


Since we have uncharacteristically warm weather for the holidays, I figured we might as well embrace the fact that we will have a green Christmas, and I've added a twist to my holiday desserts to reflect the weather.

Using extra gingerbread cookies, here's the only cold and white stuff we'll see for a while.


Gingerbread Ice Cream Sandwich
(makes approximately 6 sandwiches)
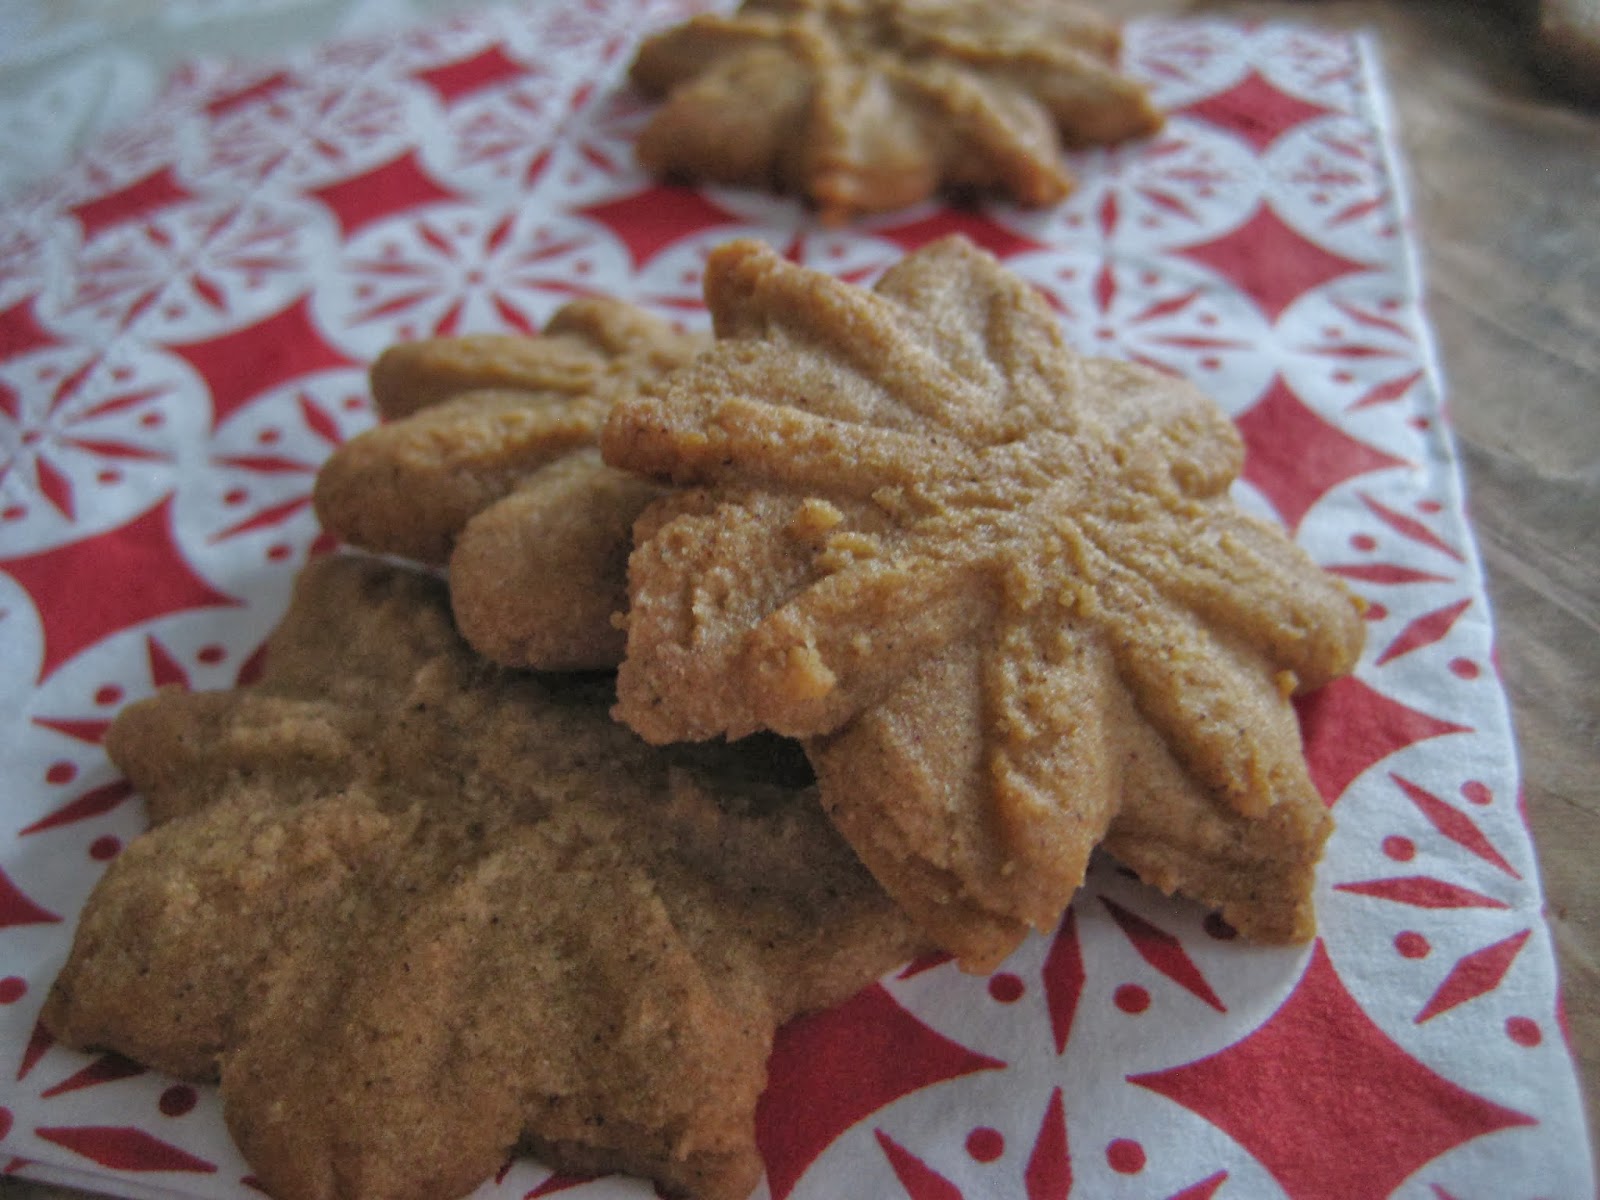
This uses a quick gingerbread recipe, which makes the cookies slightly softer in texture, making this cookie more ideal to use as an ice cream sandwich.

Ingredients
  • 3/4 cup butter, softened
  • 3/4 cup brown sugar
  • 1 pkg.  (3.4 oz.) Butterscotch Instant Pudding
  • 1 egg
  • 2 cups all purpose flour
  • 1 tsp. baking soda
  • 1 Tbsp.  ground ginger
  • 1 ½ tsp.  ground cinnamon
  • Ice cream, flavour as desired (I used vanilla)
Directions
  • Preheat the oven to 350°F. 
  • Mix the butter, sugar, dry pudding mix and egg in large bowl until well blended. 
  • Mix in the flour, baking soda, ground ginger and cinnamon, beating well after each addition.
  • remaining ingredients. 
  • Refrigerate 1 hour or until firm.
  • Roll out dough on lightly floured surface to ¼ inch thickness.
  • Cut into desired cookie shapes, preferably all the same size and shape to make sandwiches.
  • Place cookies on baking sheets, about 1 inch apart.
  • Bake for 10 to 12 min. or until edges are lightly browned. 
  • Cool on baking sheets.
  • Spread desired amount of ice cream between two cookies.
Enjoy!!!


Friday, October 09, 2015

the comfort of thanksgiving


Now that it's officially autumn, relaxed beach visits of the summer are a distant memory as we start to seek the warmth and comfort of the season.  If the beginning of September is a symbolic way to hit the restart button as we dive into new school routines, then October, especially during the Thanksgiving season, is when we start settling into the comfort zone.  It's when we really reflect our home, and our busy world surrounding it.

It's been an interesting time as I've started spend more time offline than online.  The summer was a refreshing start to cleanse any old baggage and start the school year with fresh eyes and settle into a new routine.  The quest to disconnect for most of the summer meant that I could enjoy much more deeply, what is most meaningful in our family.  And I think I like this new focus.


The heart is where the home is, and there is something very comforting about the food made for holidays like Thanksgiving that speaks to my heart.  Certain scents like turkey in the oven that make a house smell like a home, and all the love of family gathered together for this special time.

I generally don't make stuffing as it's on the list of things that my Mom brings for our annual Thanksgiving dinner.  (she makes an excellent rice/sausage/bread stuffing...I need to get that recipe!).
However, on a whim, I decided to make this corn bread stuffing to go with a chicken dish.  It's a hybrid of various dressing recipes, and although I love my Mom's rice stuffing, this is quickly becoming a favourite too (especially since there are many corn bread lovers in this house).

To all my family, friends and Canadian readers...


Happy Thanksgiving weekend!!!


Cast Iron Skillet Corn Bread Sausage Stuffing

You can purchase premade cornbread for this recipe.  I made two batches of cornbread from scratch in my cast iron skillet (using this cornbread muffin recipe, here). One batch was used for this recipe and the other one I froze to enjoy at a later date.

Ingredients
  • 1 pan cornbread (8-inch square), cut into 1/2-inch cubes
  • 8 slices white sandwich bread, cut into 1/2-inch cubes (I used 3 dinner loaves...white, pumpernickel and whole grain).
  • 4 slices bacon, cut into 1-inch pieces (I used honey garlic maple sausage 500 g package or one or two 375g package of breakfast sausages)
  • 1 small yellow onion, diced small
  • 2 stalks celery, diced medium (optional)
  • 2 cloves garlic, minced (I used roasted garlic)
  • 1 tablespoon finely chopped fresh sage leaves (1 tsp. dried sage)
  • 2 large eggs, lightly beaten
  • 2 3/4 cups chicken broth (I used turkey broth)
  • 1/2 cup chopped fresh parsley
  • Coarse salt and pepper
  • ¼ cup of dried cranberry (to taste...I used about ¼ cup)
DIRECTIONS
  • Preheat oven to 375 degrees. 
  • Spread cornbread and bread on two rimmed baking sheets and bake until dry and golden, about 20 minutes. (you an do this ahead of time...just place toasted bread in a sealed ziplock bag for up to 2 days).
  • Meanwhile, in a 10" cast iron skillet, cook sausage over medium until fat is rendered and meat is browned, about 5 minutes. 
  • Add onion, roasted garlic and cook until translucent, about 4 minutes. Stir in sage and transfer to a large bowl. (I used a stock pot...didn't have large enough bowls!)
  • Add toasted cornbread & bread, eggs, broth, parsley, 1 1/2 teaspoons salt, and 1/2 teaspoon pepper to bowl and toss until combined. Let sit 5 minutes, then toss again, this time with the cranberries (if using).
  • Spoon stuffing back into the cast iron skillet. 
  • Bake until top is golden brown, 20 to 25 minutes.

Wednesday, April 22, 2015

the simple five: chocolate hazelnut fudge


Fudge is one of those sweet pleasures that taste rich and satisfies a sweet tooth with just a small piece.
The sweetness of fudge often evokes that feeling of homemade treats.  I love visiting countryside bakeries that serve homemade treats. One can often find handmade fudge wrapped in saran wrap with a handwritten price sticker, offered on the counter.

When I make fudge, I like to switch the ingredients, using a variety of flavours (like maple or butterscotch).  However, this chocolate hazelnut recipe is a favourite in our house.

Enjoy!

Chocolate Hazelnut Fudge
(makes approximately 12-16 servings).

Ingredients
  • 2 cups of semi-sweet chocolate (you can use baker's chocolate or chocolate chips).
  • 3 tbsp. unsalted butter (optional, if you prefer a buttery fudge).
  • 1 can sweetened condensed milk (150ml)
  • 2 tsp vanilla extract
  • 1 cup chocolate hazelnut spread (organic, homemade or Nutella)
Preparation
  • Line an 8×8 inch baking pan with parchment paper leaving about an inch hangover on each side.
  • Chop chocolate (or use chips) in a microwave safe bowl with the butter (if using) and the condensed milk.
  • Microwave on high, stirring every minute, for 2-3 minutes.
  • Remove and stir in vanilla and chocolate hazelnut spread
  • Spread in the lined baking pan.
  • Refrigerate for 2 hours or until firm. 
  • Using the parchment paper overhang, lift the fudge out of the pan, and cut into squares.
Serve. 


Friday, April 10, 2015

the simple five : chocolate toffee crunch


Every year, I seem to miscalculate how much chocolate I should purchase for Easter.  My eyes are larger than my stomach (and wallet), and with other chocolates collected from the Easter Bunny, family and friends, our house can rival Willy Wonka.  I'm not complaining though.  It just gives me a reason to consume use up whatever is in the house.


Here's a quick way to use up some of that overabundance of chocolate.  This recipe is a variation of the "crunch" bars found on the back of those "Baker's chocolate" packages, using ingredients I already have in my cupboards...including all the sweetness left behind by the Easter Bunny.


Enjoy!


Chocolate Toffee Crunch
(makes approximately 12 small servings)


Ingredients
  • 35  whole wheat saltine crackers
  • ½ cup  butter
  • ½  cup  packed brown sugar
  • 1 cup of chocolate, chopped in small pieces.  (I used 3/4 cup milk chocolate left over from Easter and ¼ cup white chocolate...you can use chocolate chips).
  • 1 cup of a variety of the "crunchy topping".  (You can use crushed candy, nuts or even dried fruit. I used ¼  cup finely chopped toffee bits like Hershey's Skor Chipits, found in the baking section and 3/4  cup unsalted roasted peanuts, chopped).
Preparation
  • Preheat the oven to 400ºF.
  • Place the crackers in single layer on a parchment covered baking sheet.
  • Heat butter and sugar in saucepan on medium-high heat until butter is melted and mixture is well blended, stirring occasionally. 
  • Bring to boil; cook 2 min. (Do not stir.) 
  • Spread onto crackers.
  • Bake for approximately 7 min. or until topping is golden brown. 
  • Immediately sprinkle with the chocolate chips; let stand 5 min. or until melted.  
  • Using a spatula, spread the melted chocolate chips evenly over the crackers.  
  • Top with the white chocolate chips, and swirl onto into the chocolate to make a marble design.
  • While the chocolate is still soft, top with the crunchy stuff...toffee pieces and or peanuts.
  • Cool, then break into pieces.


Friday, March 27, 2015

the simple five: anchovy infused orecchiette with broccoli


Orecchiette is a uniquely disc shaped pasta that originates from Southern Italy.  Once cooked, this pasta creates little "bowls", making it ideal for light sauces, as most of the flavour is retained within the hollows of the pasta.

This recipe is an easy adaptation a traditional Italian dish, but as usual, uses only five ingredients (and easy to find ingredients).  Tuna would work well with this dish, but I chose anchovies to add flavourful depth, as the saltiness of the anchovies are balanced out with the broccoli. Anchovies are an acquired taste, but if you like food that with has a salty "bite" in flavour, this is your dish.

Enjoy!


Anchovy Infused Orecchiette with Broccoli 
(makes approximately 4-8 servings)

Ingredients
  • 450g box of orecchiette pasta
  • 4 tbsp olive oil
  • 6 anchovy fillets in oil, chopped (reserve 1 tbsp oil)
  • 4 garlic cloves, thinly sliced
  • ¼ tbsp (about ½ of a lemon, juiced)
  • 1 small broccoli, cut into florets
Preparation
  • Cook the orecchiette according to the package. 
  • Mince/chop the anchovy.  Set aside.
  • Meanwhile, heat 3 tbsp of the olive oil and 1 tbsp of the oil from the anchovies in saute pan/pot. 
  • Add the garlic until the garlic is slightly golden. 
  • Add the anchovies and lemon juice, and cook for 1-2 mins more until the anchovies "dissolve" and become part of the sauce.
  • Toss with the pasta.
  • Add the broccoli and toss with the pasta until the broccoli is bright green.
  • Season with salt, pepper or parmesan (if desired), and serve.


Friday, March 20, 2015

the simple five: grilled gouda and smoked salmon baguette


While we approach the finish line of March Break and school lunches are on the back of my mind (very back), here's a really lovely grilled cheese sandwich geared for adults (although my kids love this too) that slowly gets us back to making sandwiches.


Enjoy the remainder of March Break.


Grilled Gouda and Smoked Salmon Baguette
(Makes 2 sandwiches)


Ingredients:
  • 4 slices of french baguette bread
  • 4 tablespoons unsalted butter, cut into 1 tablespoon chunks and allowed to soften
  • 150g package of smoked salmon
  • 4 oz Gouda, thinly sliced
  • Extra butter for the pan; if needed

Instructions:
  • Heat a large pan or griddle over medium-heat. 
  • Place bread on a clean surface
  • Layer 1/2 of the cheese on one side, and 1/2 of the salmon on the other side
  • Repeat for all the slices of bread.
  • Spread each side of bread with one tablespoon of butter.
  • Place sandwich in the prepared grill and heat on each side for about 3 minutes each, or until the bread has crisped and the cheese has melted.


Friday, March 13, 2015

the simple five: garlic roasted eggplant dip


I usually make this eggplant dip at the spur of the moment (when eggplant is on sale or when it looks so appetizing in the store), and I end up trying to recollect the recipe as I put the eggplant in my grocery cart.  Tahini is the ingredient that I forget the most often.

This recipe is a slight modification on the traditional "Baba Ghanoush", a middle eastern
dish, but I replaced tahini with general pantry staples.  Makes a great vegetarian dip for pita breads, crackers or crudites.  Perfect for healthy snacks over the March Break.


Happy March Break!


Garlic Roasted Eggplant Dip 
Makes approximately 1 ½ cups


INGREDIENTS:
  • 1 eggplant, large
  • 1/4 cup lemon juice
  • 2 tbsp. sesame seed oil
  • 3-4 cloves of garlic, roasted
  • 1 1/2 tablespoons olive oil
DIRECTIONS:
  • Preheat oven to 400 degrees F (200 degrees C). Lightly grease a baking sheet.
  • Place eggplant on baking sheet, and make holes in the skin with a fork. 
  • Take the whole garlic and wrap it in tin foil.
  • Roast both the eggplant and garlic for 30 to 40 minutes, turning occasionally, or until soft. 
  • Remove from oven.
  • With a knife, slice the eggplant down the middle and scoop the contents in a bowl.
  • Place eggplant, lemon juice, sesame oil, and garlic (amount of cloves to taste) in an electric blender, and puree. Season with salt and pepper to taste. 
  • Transfer eggplant mixture to a medium size mixing bowl, and slowly mix in olive oil. Refrigerate for 3 hours before serving.


Wednesday, March 04, 2015

the good from the bad


I recently read an article about a 90 year old widow in China who had sadly lost all of her children and spouses and has lived on her own without any surviving family for the past 30 years. (read the article, here) While planning for her final days, she had a simple request when she was planning her funeral...for people to come to it.  This request was published in her local paper, and a heartwarming response ensued from readers, giving her a glimmer of happiness as they decided to spend some time with her now while she was alive, instead of waiting for her death.  .

It is a lesson I've tried to teach the kids as we go through life on dealing with the ups and downs of it. With trials and tribulations, the obstacles and disappointments that greet us only can make us stronger and help us strive for and appreciate, when the good times come.  Our son recently said that he noticed how light seems to glows brighter when it's dark, like it's showing you the path out of darkness, toward the light. Understanding this metaphor, a light seemed to really shine as he realized that sometimes he might not win a game (or a swim meet) but the lessons he learns when he doesn't win only makes winning later on, much sweeter.


It's a fine art to balance the emotions between the two and to remind ourselves that there are lessons in our mistakes.  Sometimes falling can only make you stronger, and that's where the "good" comes from the "bad".  


Bacon, Spinach and Mushroom Pasta
(makes approximately 4 servings)

This pasta has elements that are both good and "bad" for you...I tried to reduce the amount of the "bad"  (bacon) by using organic, reduced fat bacon.  The spinach provides a good balance of nutrition, and makes this dish "good".

Ingredients
  • 1 cup low sodium, organic bacon, sliced (about 8 slices)
  • 1 small onion, thinly sliced
  • 1 cup mushrooms, sliced 
  • 2 garlic cloves, finely chopped
  • 1 cup spinach, chopped and removing stems
  • 1 ½  cups 2% milk (or cream if you wish for a creamier sauce)
  • ½ cup of grated parmesan cheese
  • Pepper to taste (I don't add salt to this dish as most of it derives from the bacon and parmesan cheese, so I don't usually add to the sodium content).
  • 450g pasta (penne or linguine works nice here).
Preparation
  • In a cast iron skillet, sautè the onion & bacon together until the onion is translucent and the bacon is cooked.  Drain the oil/fat. (no butter is necessary in this dish as the oil from the bacon, even when drained, is enough to coat the cast iron skillet to do the job!).
  • In the meantime, cook the pasta according to directions.
  • Add the mushrooms and garlic and saute until the garlic is browned.
  • Add the spinach, and sautè until the spinach is wilted.
  • Add the milk then top with parmesan and simmer, stirring until the sauce is thickened. 
  • Toss with cooked pasta.
Enjoy!


Wednesday, February 18, 2015

tomorrow is a new year


My brother bought this incredible egg waffle maker from Williams Sonoma, and was eager to test to see if the recipe that came with the product would be similar to the popular Chinese "Eggette" (otherwise known as "egg pops" or  "egg waffles").  With Chinese (Lunar) New Year tomorrow, I thought I'd try this recipe...with a twist.


Using a cake pop maker (a previous Christmas gift he gave to my daughter), I made these little cake "pops" that are reminiscient of the street food, "Hong Kong Egg Waffles" that are sold by street vendors.

Not exactly the same in presentation... these are more round than in the shape of little flat "eggs" of the original version, and the egg waffles in HK are attached to each other to form a waffle.  However, this is the closest that I was able to get without running out to buy yet another kitchen gadget or to the local Chinese market (although I encourage anyone to try these at the market at least once!).  They're soooo good.

Cheers to my family and friends.


Happy Chinese (Lunar) New Year!


Hong Kong Egg Waffle Inspired Cake Bites
(Makes 24 bites)
Adapted from: Ginger & Scotch


Ingredients
  • 1 cup (4 oz or 120 g) all-purpose flour
  • 1 teaspoon baking powder 
  • 1 teaspoon corn starch with 1 tsp. vanilla extract (to replicate custard powder)
  • 2 large eggs
  • ⅔ cup of sweetened condensed milk
  • 2 tbsp. sugar
  • 1 tablespoon melted butter
  • 1 tbsp. almond extract
Directions:
  • Melt the butter in a mixing bowl.
  • Stir in almond extract, condensed milk and eggs.
  • Add the sugar, vanilla extract and cornstarch.
  • Stir until mixed.
  • Stir in the baking powder, then the flour (slowly).
  • Spray the cake pop maker with oil.
  • Pour batter into each of the cake pop holes, only filling half way.
  • Close lid and let it bake for approximately 3-4 minutes.
  • Remove and let cool.
Enjoy!


Wednesday, February 11, 2015

the simple five: slow cooker cheese potato soup


Nothing is better than spending a full day outdoors enjoying winter activities, and then being welcomed to a home filled with comforting aromas indicating that dinner is ready and waiting for you. I love using my slow cooker, and this particular recipe is a nice hearty soup, especially if you're feeding a crowd.  Fun to serve in bread bowls, and perfect to feed a large group or family (maybe for Family Day this weekend?)

This recipe makes a large batch but can be halved if you're not consuming this all in one night. Half can be served right away, and the other half placed in a container (once the soup is cooled) and frozen for up to 3 months. This recipe is quite adaptable, and you can replace the green onions with caramelized onions, roasted garlic, dill or shallots.  I've even used left over Garlic Roasted Cauliflower with good results.

Enjoy!


Slow Cooker Cheese Potato Soup (for a crowd)
(makes approximately12 servings).


Ingredients:
  • 4 cups of stock (chicken, vegetable or beef.... I generally use chicken or vegetable, but have used beef stock when I'm not adding crumbled bacon as a topping).
  • 8-10 russet potatoes, cubed
  • 1 stalk green onion, (thinly sliced green and white parts)
  • 1-2 cups of shredded cheddar cheese (depending on taste).
  • 2+ cups of milk or heavy cream.
Preparation:
  • Place potatoes in an 8 quart crock pot.  Add stock until it just covers the potatoes, approximately 4 cups or so.
  • Add green onion.
  • Cook on low for about 8 hours or high for 4.
  • Turn slow cooker off.
  • Using an immersion blender, puree the contents in the crock pot until it has the consistency of very thick soup (or place contents in batches, in a blender).
  • Add the cheddar cheese and stir until the cheese is melted.  (I used about 1 ½ cups of cheese).
  • Add milk or cream until the soup thickness is to your liking (I use about 2 ½ cups of milk...use more if you want a thinner consistency).
Garnish with sour cream, crumbled bacon, chopped green onions, or dill, if desired.


Wednesday, February 04, 2015

soaking up the sweet


This past week an expected storm resulted in a snow day.  School was closed and the kids were cheerfully home.  We took this extra day as an opportunity to pack, prepare and finalize any school work before our son was going to embark on a snow adventure for an overnight school trip.   

It's amazing what a year of maturity can bring, as he demonstrated by packing his bags wisely, not just according to the weather, but also in an orderly fashion based on his travel habits.  Daily items in an easy access backpack. Extra snow gear at the bottom of the bag.  Everything placed according to how he's accustomed to travelling. After packing, we spent time chatting while shovelling the driveway, then he took a break and basked in the emerging sunshine.  Work is done!


I guess our family trips have surprisingly taught him lessons beyond cultural and geographical ones.  Although I am often frustrated (like any parent has experienced) when he loses or carelessly forgets his belongings, it seems like he has transformed overnight into a young adult....self aware of his own habits and abilities.  

On the morning of his trip, we woke up early to ensure we were prepared. As I anxiously went through his packing list one more time before we left, he smiled his big warm smile and reassured me that everything was "in the bag" (figuratively speaking).  


He was right (and for a brief moment I realized we were having a parent/child role reversal moment). I stopped micromanaging and let him take charge. It's a lesson to remember at times like these, to stop and see his warm smile and like this bread pudding recipe below, soak up as much of his child-like sweetness for as long as I can. For it will not be long before my young boy will be transformed seemingly overnight again, into an amazing, reassuring, sweet young man. 


Apple Crumble Raisin Bread Pudding
(makes approximately 12 servings)


This recipe combines the traditional tastes of bread pudding combined with the sweet as pie tastes of apple crumble on top.

Ingredients
  • 8 slices of raisin bread, cubed
  • 4 eggs
  • 1 ½  cup half and half
  • 1 teaspoon vanilla extract
  • 2 apples, peeled and sliced
For the Crumble topping
  • ½  cup of flour
  • ¼ cup of oats
  • ⅓ cup of brown sugar
  • 1 tsp. cinnamon or nutmeg (to taste)
  • 6 tbsp. butter, cubed.
  • In a small bowl, mix the flour and oats.  Add the sugar and cinnamon. Add the cubed butter, and mix with a pastry cutter or fork until it resembles crumbles (the size of peas).
Preparation
  • Preheat the oven at 350 degrees.
  • In a large bowl, scramble the eggs
  • Add the vanilla and half and half.  Mix well.
  • Add the cubed bread and mix until bread soaks up the egg mixture.
  • Press bread mixture into an 8x8 square pan
  • Layer the sliced apples on top.
  • Sprinkle the crumble topping (recipe below).
  • Cover with aluminum foil.
  • Bake in the oven for 30 minutes.
  • Remove the aluminum foil and bake for 15 minutes more.
Top with ice cream, caramel syrup or enjoy on it's own.


Friday, January 30, 2015

the simple five: easy guacamole


Since Super Bowl is this weekend, many people are preparing "game day" foods (staples such as nachos, chips, chilli...basically anything comforting).  While some of those foods aren't exactly the most healthy, here's an easy and delicious way to add some nutrients to your game day menu.

Enjoy!


5 Ingredient Easy Guacamole
(Makes about 3 to 4 cups)

While storing in the refrigerator, a trick to prevent the guacamole from turning brown is to place a layer of plastic wrap directly on the surface of the mixture.

Ingredients
  • 5 ripe avocados
  • 2 tbsp. finely chopped red onion
  • 2 tbsp. fresh lime juice
  • 1 garlic clove, finely chopped.
  • ½ teaspoon salt

Preparation
  • Cut avocados in half, remove seed and and scoop into a bowl.
  • With a fork, mash the avocado, leaving it slightly chunky in texture (if desired).
  • Stir in the juice, garlic, salt and red onion.
  • Cover with plastic wrap and refrigerate until ready to serve.

Serve with tortilla chips (or as a condiment for game day foods like chilli, nachos or burgers).


Friday, January 23, 2015

the simple five: roasted garlic cauliflower


I've read somewhere in those food magazines that cauliflower is the "new vegetable of the year".  Not sure why it's considered "new", since it's been available at grocery stores longer than kale has.  No matter the reason, I'm embracing this new "trend", using this wonderfully dense vegetable as a great side dish instead of potatoes.  It's quite filling, very nutritious, and easy to make.

What I also like about this dish, besides that it only uses five ingredients, is the fact that you can use the leftovers for soup. I've added this to potato and cheese, or broccoli and cheese soup with wonderful results (can you tell I like cheese in my soups!).

Enjoy!

Roasted Garlic Cauliflower
(makes approximately 6 servings)

Ingredients
  • 1 large head of cauliflower
  • 3 tsp dried thyme (or about 4 sprigs of thyme, if you're using fresh)
  • 4 garlic cloves, minced
  • 4 tablespoons olive oil
  • ¼  cup of Parmesan cheese
Preparation
  • Preheat oven to 425°. 
  • Cut 1 head cauliflower into florets; 
  • Toss on a large rimmed baking sheet (I used my cast iron skillet) with olive oil, thyme, and garlic cloves.
  • Roast, tossing occasionally, until almost tender, about 20 minutes. 
  • Remove from the oven and sprinkle the grated parmesan on top of the cauliflower.  Put back in the oven for an additional 10 minutes.


Friday, January 09, 2015

The Simple Five: Panna Cotta

Panna Cotta is an Italian dessert traditionally made with cream, egg white and honey, which is then baked in the oven. This version is a simpler, non-bake version than the traditional panna cotta, and is served chilled (similar to a custard or pudding).

I love how flexible this dessert is considering there the basic recipe has only five ingredients. You can add any kind of flavourings to it (vanilla, chocolate, maple syrup) according to taste, and it can be served anytime of the year.  It's a fresh dessert alternative, particularly after heavier meals (or if you want something light after the indulgent holidays). It's easy to make ahead of time and kept in the fridge until it's ready to serve (perfect for dinner parties).


Enjoy!!!


Simple Panna Cotta
(Makes approximately 6 servings)


Ingredients
  • 4 teaspoons powdered gelatin
  • ⅓  cup sugar
  • 4 cups of half and half cream
  • 1 ¼  teaspoon pure vanilla extract
  • Pinch salt (optional)
Directions
  • Pour 2 cups of the cream into the saucepan and sprinkle the powdered gelatin evenly over top. 
  • Let soften for 5 minutes or until the surface of the milk is wrinkled and the gelatin grains look wet (this is called "blooming the gelatin").
  • Warm gently over low heat, whisking frequently for approximately 2 minutes or until the gelatin is dissolved (the cream should not be boiled...remove if you see steam and let it cool down).  
  • Add the sugar into the cream stir until dissolved.
  • Remove the saucepan from the heat. 
  • Whisk in the remainder 2 cups of cream, vanilla, and a pinch of salt.
  • Pour into small bowls or ramekins and chill for approximately 2 hours. (If you want to un-mold the panna cotta, chill overnight in greased bowls/ramekins).
Serve as is...or topped with any fruit, sauce or or chocolate shavings.  


Wednesday, December 31, 2014

climbing mountains


Usually at this time of the year, I try to clean up old files and sort through our photographs.  It's actually quite fun to go down memory lane to see what we've experienced, accomplished and enjoyed in the past 365 days.  I've seen so much growth in both of our children, and in ourselves, "the adults".

I remember taking the above picture last winter.  We spent a few days up north over the New Year holiday, and this was a particularly beautiful winter day with lots of sunshine, crisp cool air and fresh snow. We filled our days with skiing, tobogganing, trekking on snow trails and laughter.  So much laughter.


In the evenings, we headed back to the cottage cabin for some hot chocolate and warm comfort food. The kids were still full of energy and it seemed that our full days of activities didn't tire them at all (unlike their old mum!).  I remember asking them if they were tired from climbing "the mountain" (some of the hills felt as tall as a mountain).  They shook their heads and said "the higher the hill, the better the ride!"

As we approach 2015, this photo reminds me of that New Year's Day.  The moment when I realized our kids understood that hard work pays off.  Although I don't usually make resolutions, I begin this new year reminding ourselves that in order to enjoy the ride, you must climb the mountain first.


Wishing everyone all the best for 2015.

Happy New Year !!!


Make Ahead Banana Almond Bread Pudding 
with Chocolate Hazelnut Drizzle.
Recipe adapted & combined from
Chocolate Banana Bread Pudding and Baked French Toast


This bread pudding is a cross between baked french toast and traditional bread pudding.  It's worth the effort to make ahead of time...it's a wonderfully sweet morning treat and works well for a laid back New Year's Day morning, since can be easily placed in the oven while none of the creatures in the house are stirring.

INGREDIENTS:
  • 4 eggs
  • 2 ½ cups milk
  • ⅓ cup heavy cream (or ½ cup of milk of you don't have cream)
  • 1/4 cup brown sugar
  • 1 tsp. vanilla extract
  • 1 tsp. cinnamon
  • 1 tsp. nutmeg
  • 1 tsp. ground cloves
  • 6 cups cubed French bread (or about 15- one inch slices)
  • 2 bananas, sliced
  • Almond slices (to top with)
  • Brown sugar (to top)
  • Chocolate Hazelnut spread (like Nutella)...to drizzle on top.
DIRECTIONS:
  • In a large mixing bowl, mix eggs, milk, sugar, and vanilla and spices until smooth. Stir in bread, bananas (you can also stir in 1 cup of chocolate chips to make this extra sweet).
  • Pour into 9x13 greased glass baking dish and cover with tin foil.
  • Let the bread soak in the fridge for at least 1 hour or overnight.
  • When ready to bake, preheat the oven to 375 degrees.  
  • Top with almonds and sprinkle brown sugar on top.
  • Bake for 25 minutes covered with foil.
  • Bake another 25 minutes without foil, or until the knife inserted in the centre comes out clean.
  • If desired, slightly warm the chocolate hazelenut spread in the microwave for about 30 seconds. Drizzle.
Serve with syrup.  Enjoy.


Wednesday, December 17, 2014

happy face


Each year, the kids perform in their school's Christmas concert, and it's a busy week of rehearsals, costume preparations and a flurry of activity on the last week before the Christmas break.

This year, it felt like time rushed past us a little too quickly, as it seems like we were just adjusting to the new school year.  Now that the children are more and more involved with extracurricular activities, it becomes more challenging to dedicate what little precious time we have left, to prepare for the holidays. In the past, it is during this time of preparation...the baking, the decorating, when we participate as a family and talk about our year ahead, our year behind, or just about what we want to do during the holiday season.


Even though there is constant travel between regular school and work activities along with holiday events, I've found that we now have even more family conversations.  It is during our commute when I hear the funniest jokes, odd curiosities or reflective tales, spoken freely without intention or judgement, but rather just a casual chat to occupy the time while Mom is focused on driving the car.

Although we will continue to enjoy our some of our Christmas traditions...making gingerbread houses, baking cookies, ice skating at the local rink, I won't worry that we aren't "doing enough activities" with the kids this Christmas. Even on those days when we're not doing anything "special", we will choose to be present and in the moment during those precious times we have together...laughing, singing or just chit-chatting.  And watching their happy faces is special enough for me.


Cinnamon Infused Vanilla Cupcakes with Cinnamon Frosting 
(& gingerbread cookie topping)

These are cinnamon bun inspired cupcakes with cinnamon cream cheese frosting.  I made these for a party, and topped each cupcake with a gingerbread cookie for decoration {recipe, found here}, although these are pretty sweet without it.

Ingredients:

For the cupcakes:

  • 1 and 2/3 cups (210g) all-purpose flour
  • 1/2 teaspoon baking powder
  • 1/4 teaspoon baking soda
  • 1/2 teaspoon salt
  • 1 and 1/2 cups (300g) granulated sugar, divided
  • 1/2 cup (1 stick or 115g) unsalted butter, melted
  • 1 large egg
  • 1/4 cup (60g) yogurt
  • 3/4 cup (180ml) milk
  • 1 Tablespoon vanilla extract
  • 2 teaspoons ground cinnamon
Time saving alternate:
You can use pre-made white cake mix.  If you follow the instructions, replace the water with milk. )

For the cinnamon frosting:

  • 1 cup unsalted butter, softened to room temperature
  • 3 cups icing sugar
  • ¼  cup heavy cream (milk works too)
  • 2 teaspoons vanilla extract
  • 1 Tablespoon ground cinnamon
Time saving alternate:
You can use pre-made frosting.  Just mix in some of the cinnamon/sugar mixture into vanilla frosting, and add 3-4 tbsp of cream cheese to the whole frosting can.  Mix well.  (it tastes similar to cream cheese frosting for cinnamon buns).

Cinnamon Sugar topping/layer:


  • Mix ¼ cup of sugar with 1 tsp. of cinnamon.  (double the quantity if needed).
Directions:

Cupcakes
  • Preheat oven to 350F degrees. 
  • Line muffin tin with 12 cupcake liners. Set aside.
  • In a medium bowl, mix together flour, baking powder, baking soda, and salt. Set aside. 
  • In a large microwave-safe bowl, melt butter in the microwave. 
  • Whisk in 1 cup of sugar.
  • Stir in egg, yogurt, milk, and vanilla extract until combined. 
  • Slowly mix in dry ingredients until no lumps remain. 
  • Spoon about 2 tbsp. of batter into each cupcake liner.  
  • Sprinkle 1 tsp. cinnamon sugar mixture on top.
  • Top another tbsp. of cupcake batter on top of the cinnamon sugar mixture or until the liners are about 3/4 full.
  • Top each cupcake with 1 tsp. of cinnamon sugar.
  • Bake the cupcakes for about 20 minutes or until a toothpick inserted in the center comes out clean. Allow to cool before frosting.
Cinnamon Frosting:


  • Beat softened butter on medium speed with an electric mixer until smooth and creamy. 
  • Add icing sugar, cream (or milk), and vanilla extract.  Continue to mix.
  • Increase to high speed and beat for 3 more minutes or until really creamy.
  • Add more confectioners' sugar if frosting is too thin or more cream if the frosting is too thick.   
  • Add 1 Tablespoon of cinnamon and beat until combined, about 30 seconds.
  • Frost each cupcake.
If you wish, top with gingerbread cookies for decoration, or just serve as is.  Store cupcakes in an airtight container at room temperature for up to 3 days and in the refrigerator up to 5 days.

Enjoy!


Wednesday, December 10, 2014

shining star


We've been very fortunate to enjoy many holiday celebrations so far...gatherings with friends, stage productions, holiday festivities...taking it all in and enjoying each moment.

Last week, we had the privilege of watching a charming musical production of Cinderella, making it a family-only night of good food and entertainment.  During the intermission, one of the stage managers approached our daughter and asked if she wanted to go on stage to meet Cinderella in front of the live audience. Although my husband and I were enthusiastic and thought it would have been a fun opportunity for her, we didn't want to pressure her into any decisions and allowed her to go with whatever her heart felt.  Although she was flattered by the invitation, she kindly smiled, thanked the young gentleman and declined the offer.


Later that evening, she sensed our curiosity with her decision and as we were driving home, she stated that she really enjoyed kicking back and just watching the show with her family and didn't want to disrupt that time with us just for a few minutes of "performing and be the centre of attention".

Although the lure of the bright lights and audience applause was tempting for her to go on stage, her decision made me proud and amazed at how mature she has become.  She doesn't get easily dazzled or persuaded by what's flashy, but stood her ground with knowing what she felt was important to her at that moment and didn't need false admiration to fulfill her. 

As her parents, we know that the world will be our children's stage, with many more opportunities in the future for both our daughter and son to show how amazing they are. And when that time comes, we know in our hearts, that their star will shine long and bright, beyond any brief spotlight on stage.


Traditional Gingerbread Cookies
(makes approximately 4 dozen)

This recipe makes a crisp cookie, making it ideal to decorate gingerbread people with icing.  Light, simple and easy.

Ingredients
  • 1/2 cup butter, softened
  • 1/2 cup brown sugar
  • 1 egg
  • 1 tbsp. water
  • 1 1/2 cups unbleached white flour
  • 1/2 tsp. baking soda
  • 1/4 tsp. salt
  • 1 tsp. ground cinnamon
  • 1 ½  tsp. ground ginger
Preparation
  • Preheat the oven to 350degrees F.  Line cookie trays with parchment paper.
  • Cream the butter and sugar together, then add the egg and water, and mix until fluffy.
  • Stir together the dry ingredients:  flour, baking soda, salt, cinnamon and ginger.  
  • Add to the first mixture and beat until the dough is mixed.
  • Shape the dough into 2 equal sized rolls, flour your hands and the work surface, wrap in plastic wrap and chill until firm for at least 30 minutes.
  • Place dough onto a lightly floured surface and roll to a thickness of about ⅓ to ¼  inch (the thicker the better for icing).  Cut out shapes (or put through a cookie press, as I used for the star shaped cookies above) and place about 1 inch apart on the cooking sheet.
  • Make the remaining shapes until all the dough is used.
  • Bake for about 10 minutes until the cookies are lightly browned.
  • Transfer to racks to cool
If you desire, you can decorate with icing.  Recipe found here: Christmas Past

Enjoy!