Wednesday, November 30, 2011

cran it in

The big weekend is about to approach. You know this weekend...the first weekend of December. It's when the Christmas season officially kicks off. Christmas trees are put up. Ornaments have been dug out of hiding, dusted and are ready to go on the tree. Christmas songs begin to play on the radio, and you can start to see the parking lots getting A WHOLE LOT busier. The sale signs begin enticing you. Coupons sent in flyers to bring you into the stores. We start checking our lists...more than twice.

It's a feeling of "it's here!"...and then, "ughhh..it's here!"


Thankfully, it is also a season to gather with friends and loved ones. To find holes in the schedules to share hugs and warm cocoa. Holiday parties and Christmas cheer. To momentarily, take a breather from the commercial madness to sit back, really enjoy each other's company and rejoice in the season. And to worry about cramming in the last minute "to do" list for another day.


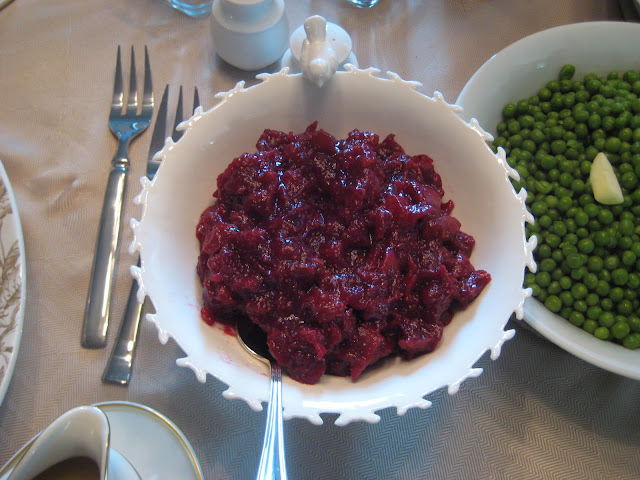
Cranberry with Dried Fig Sauce on Brie
(adapted from a Martha Stewart recipe)

It's more like a chutney than a traditional cranberry sauce, can be served several ways (as a condiment with dinner or an appetizer with brie cheese and crackers).

Ingredients
  • 1 bag fresh or frozen (thawed) cranberrie
  • 5 ounces dried Calimyrna figs, halved (about 1 cup)
  • 1/2 cup sugar
  • 1/4 cup cranberry juice
Preparation
  • In a small saucepan, combine all the ingredients and cook over low heat until most of the cranberries have burst, about 15 minutes.
  • Transfer cranberry sauce to a small bowl. 
  • Let cool; cover, and refrigerate up to 3 days. 
Top the brie cheese with the cranberry fig sauce, and warm brie in the oven at 350degrees until soft (approx. 15 minutes).  Serve with crackers.

Enjoy.


Monday, November 28, 2011

relish the moment


After dinner, my son wanted to eat one of the pomegranates I had on the counter.  So I sliced it open, handed him a spoon with the fruit, and said "go for it".  Then had an "oh-no" moment because I realized what I just did.

As anyone who has tried to remove pomegranate seeds would know, this is not exactly a mess-free act of consumption.  And as much as I wanted to take back the fruit so I can serve him just the juicy seeds, I actually stopped myself and had a little laugh as I quietly stood there, watching my little boy dig voraciously into that red-juice-squirts-everywhere-in-sight fruit (and afterwards, let's just say my white kitchen looked like a scene from a horror movie!).

I've been told by many friends who have teenaged children, to enjoy my children while they're still young now. I have to admit...this is a sweet age.  They're still young enough to want to be around me, but old enough for some kind of independence.  I know this won't last forever...eventually they'll want total independence, but for now, I'll take whatever I can get.

With Christmas fast approaching, and my "to-do" list getting longer, I hope I can get everything done so I can sit back, enjoy the holiday season...and relish more moments like this.


Apple Relish with Pomegranate and Raisins
(adapted from Gourmet Food)

Ingredients:

  • 1 tablespoon butter
  • 1 large green apple, peeled, cored, and chopped fine
  • 2 tablespoons brown sugar
  • 1 tablespoon fresh lemon juice
  • 1 tablespoon raisins
  • ½ cup pomegranate seeds 
  • 1 tablespoon maple syrup

Preparation:

  • In a small skillet, melt butter. 
  • Add apples and sugar and cook over medium heat until browned and soft, about 5-8 minutes. Add lemon juice, raisins, pomegranate seeds, and syrup and heat 1 minute more. 
  • Remove from heat and keep relish warm until serving.


Serve with pork or chicken and enjoy.


Saturday, November 26, 2011

worth a thousand


Island Residence designed by Tom Stringer

Welcome to my island home...


Friday, November 25, 2011

a toast


It is exactly one month before Christmas.  The other evening, I finally finished my week long project of  designing our Christmas cards and had them sent to the printer.  It was the first hurdle for this Christmas season, and it was finally done, albeit done into the wee hours of the early morning.  So now, I am now officially in the Christmas mode, as those cards were the catalyst for me to prepare for Black Friday, and finalize my Christmas shopping.

An excerpt from last year's Christmas photo session.

I look back on my childhood and wonder how my parents did it.  They didn't have the luxury of having their cards created online to be printed.  They didn't have access to outlets, Black Friday sales, or online shopping.  Back then, Christmas ornaments, decor, or pretty dishes didn't change with the "style of the year"...what ever they received from their wedding registration, they used.  Every year.

But every Christmas was magical to both my brother and I.  The silver tinsel and the brightly coloured ornaments were a staple, along with every single handmade ornament we made at school, proudly hung on the FRONT of the tree.  Although I'm sure my parents fretted over the latest "toy" they had to line up and get for their wide eyed children, for the most part, Christmas seemed simpler. Every Christmas morning, my brother and I would race down the stairs, eat the fastest breakfast of the year and tear open our gifts.

I recently heard a poll on the news that said about 70% of shoppers will be spending less this Christmas.  They will be more budget minded, try to take some time off work and focus on things that really matter.


When I heard this and wondered if this is something we should have been doing all along...instead of escalating the Christmas holiday as the latest expression of fashion, maybe we should remember why we're doing this in the first place (religion aside).  As much as I love partaking in the latest trends, and decorating our home with all the beautiful ornaments and decor like it's displayed in the magazines, I need to keep reminding myself...ten years from now, will we remember the latest "pre-lit, multi-functioning, hottest coloured Christmas tree" we had sitting in our home, or the look on our kids' wide-eyed, syrup covered face, as they smile with glee, holding their latest treasure, with the wrapping paper skewed all over the floor.


Quick French Toast
(adapted from Ina Garten's Challah French Toast)


Ingredients
6 eggs
1 1/2 cups milk
1/2 teaspoon cinnamon
1/2 teaspoon allspice
1/2 teaspoon pure vanilla extract
1 tablespoon good honey
1/2 teaspoon kosher salt
1 large loaf challah, brioche (I used a French baguette, pre sliced the night before, and stored in a zip lock bag)
Unsalted butter

To serve:
Pure maple syrup
Good raspberry preserves (optional)
Sifted confectioners' sugar (optional)
Preparation
Preheat the oven to 250 degrees F.

In a large shallow bowl, whisk together the eggs, milk, cinnamon, allspice, vanilla, honey, and salt. Slice the challah in 3/4-inch thick slices. Soak as many slices in the egg mixture as possible for 5 minutes, turning once.

Heat 1 tablespoon butter in a cast iron skillet over medium heat. Add the soaked bread and cook for 2 to 3 minutes on each side, until nicely browned. Place the cooked French toast on a sheet pan and keep it warm in the oven. Fry the remaining soaked bread slices, adding butter as needed, until it's all cooked. Serve hot with maple syrup, raspberry preserves, and/or confectioners' sugar.

Enjoy slowly.


Wednesday, November 23, 2011

and pesto, it's done!


I like Wednesdays.  It's the "hump" day that signals that we're half way there to the weekend.  The kids have hot lunch at school, which means I get a small "break" from making lunch. Usually I've already planned my week, so I begin to plan for the weekend.  


I like doing little things that help the week move forward.  It mostly involves lists.  Lots of them. With Christmas coming up fast (and Thanksgiving this weekend for my American friends), it's easy to feel a little overwhelmed.  But it's the little steps that help... each time helping me feel more and more accomplished as I finish each one.


When I keep taking small steps and keep moving...all of a sudden, PRESTO, like magic, it all gets done.


Pesto Chicken Goat Cheese & Red Onion Pizza

Ingredients
  • Homemade or pre-purchased pizza dough
  • 3 tablespoons of basil pesto
  • 1/2 cup shredded mozzarella cheese
  • 1/2 cup  crumbled goat cheese
  • 2 small chicken breasts, chopped
  • Red onion, chopped
  • 1/4 cup parmesan and 1/4 cup of mozzarella, mixed together for topping.

Preparations:
  • Preheat the oven to 450degrees
  • Roll out pizza dough onto a pizza pan.
  • Spread 3 tablespoons (or more, to taste) the pesto onto the dough.
  • Spread the 1/2 cup of mozzarella cheese.  Add the goat cheese, chopped chicken and onions. 
  • Add the parmesan/mozzarella mix on top.
  • Bake for 15-20 minutes or until the cheese bubbles and browns on top.

Serve.


Monday, November 21, 2011

liebster

This past summer, as they watched a few beautiful swans swimming along the shoreline, the kids learned about how in nature, animals naturally support each other.  One of the swans was hurt, so an on-looker tried to help pull it out of the water.  In an instant, the other swans came to fend off, what they thought was a perpetrator.  The hurt swan was whisked away.

In German, the word "liebster" is derived from "liebe" which means love, friend or dearest.  I was recently awarded the Liebster award, which spotlights up-and-coming blogs who are still in their early stages (less than 200 followers), ready to blossom into beautiful swans.


So, first, I must thank Janny from Que Linda for awarding me this lovely award.  She has great ideas on her blog, and her pumpkin pie ice cream is something that should be on everyone's must try list.  

Now I get to pass this forward and spread the love...here's my Liebster award recipients, who have simply  great ideas and beautiful  creations, to help us enjoy life now.   Please visit them...meet a new friend and support their efforts.


Liebster Blog Award


The goal of this award is to spotlight up-and-coming blogs with less than 200 followers

The official rules for this award are:
1. Copy and paste the award on your blog
2. Thank the giver and link back to the blogger who gave it to you
3. Reveal your top 5 picks and let them know by leaving a comment on their blog
4. Hope that your followers will spread the love to other bloggers


Saturday, November 19, 2011

worth a thousand


Amanpulo, Pamalican Island in the Philippines

What would YOU bring to a deserted island?


Friday, November 18, 2011

in layers

This igloo was made with just a few sand pails, and a LOT of snow...
we had about 3 feet of snow that day! (and yes, my daughter wore mittens
...she briefly took them off to have her snack!)


It snowed yesterday.  It's November.  Although it wasn't significant enough to really call it snow (it melted on impact, and the snowfall only lasted for about 10 minutes), you can tell that winter is just around the corner.


I didn't dress my children appropriately.  I prepared them for colder weather, but not SNOW!  Of course, guilt sets in.  And of course, they were fine.  No frozen digits, no one has the cold. It wasn't really snowing (as I keep telling myself)...just a little precipitation.

So, I guess it's that time of year, when you start taking out heavier jackets.  Pulling out the mittens and hats.  Dressing in warmer layers...because one minute you'll be sweating like it's summer, the next, fighting a snowstorm.

Layers are good.  For wearing (or eating) in this cold, unpredictable weather.


Old Fashioned Lasagna
(adapted from Allrecipes)


Ingredients
  • 1 pound lean ground beef
  • 1 onion, chopped
  • 1 (6 ounce) can of  tomato paste
  • 1 (14.5 ounce) can crushed tomatoes
  • 2 cups water
  • 1 tablespoon dried oregano
  • 2 teaspoons garlic, minced
  • 2 teaspoons salt
  • 1/4 teaspoon ground black pepper
  • 1/2 tablespoon brown sugar

  • 12 ounces cottage cheese (or full container)
  • 1/2 cup grated Parmesan cheese
  • 1 egg

  • 9 lasagna noodles
  • 3 cups shredded mozzarella cheese
  • Parmesan (approx. 1/2 cup)


Directions
  • In a large skillet over medium heat, cook beef until brown. Drain. 
  • In another skillet over medium heat, cook onion until translucent. Combine beef and onion in a large saucepan with tomato paste, crushed tomatoes, water, oregano, garlic powder, salt, pepper and sugar. Cook over medium heat until mixture comes to a boil. Reduce heat to low and simmer 1 hour.
  • While sauce is simmering, blend cottage cheese, Parmesan and egg until smooth. Set aside.
  • Bring a large pot of lightly salted water to a boil. Add pasta and cook for 8 to 10 minutes or until al dente; drain.
  • Preheat oven to 350 degrees F (175 degrees C).
  • Spread 1 cup of sauce in the bottom of a 9x13 inch baking dish. Cover sauce with 3 noodles. Cover noodles with one-third of remaining sauce. Top with half the mozzarella. Place another layer of noodles and one of sauce over the mozzarella; top that with the cottage cheese mixture. Top with remaining 3 noodles and remaining sauce.
  • Bake in preheated oven 30 minutes. Sprinkle remaining mozzarella & 1/2 cup of parmesan on top and bake 15 minutes more, until golden and bubbly.
Serve.


Wednesday, November 16, 2011

piece of cake

If there is one thing that makes me squeamish, it's loose teeth.  Especially ones that are on it's last strings, sort of speak.  And if you're wondering...yes, I gave birth.  Twice.  Both occasions I had the privilege of almost nine pounds of bliss squeezed out of me.  Once without drugs. 

I think I was traumatized as a child when I went to a horrible dentist who removed teeth so fast, the anesthesia didn't have time to kick in...so any time there is something that involves teeth, well, let's just say, I hope nature takes it's own course.

Well, last week my daughter had her first loose tooth.  And it was a stubborn one.  I have been very fortunate up to now, that her older brother's teeth had always come out with his own urging...but this little sucker refused to come out no matter what urging from my daughter's tongue.  But it was breakfast time. And I didn't want her to lose her first tooth at school.  What if she swallows it?  What if she refuses to eat her lunch because it's too hard to eat with a wiggly tooth? 

So, I washed my hands like a surgeon, took a deep breath, closed my eyes a little, and started gently to nudge it out. Nope.  I could feel my heart pounding, blood rushing to my head, worried that I'd pass out, so I held my breath, grabbed that sucker, closed my eyes...and yanked it out.  Silence.

It came out.  No tears from me (or the kid that it came from..."it didn't hurt mommy").  It was actually quite magical! And it was a first for both of us...her first tooth for the tooth fairy, and my first foray into the dental profession.

I guess it wasn't so bad after all. I think I've now overcome my fear of loose teeth, and can help the kids remove any future straggling teeth. I guess you can say this experience...was a piece of cake.  

Cinnamon Roll Breakfast Cake 
(with Maple Cream Cheese icing) 
Adapted from Thibeault's Table

If you love cinnamon rolls and if you love cake, then this is the recipe for you.  It's has a coffee cake texture, but tastes like a cinnamon roll.  


Ingredients:


  • Cake:
  • 3 cups of flour
  • 1/4 tsp.salt
  • 1 cup of sugar
  • 4 tsp. baking powder
  • 1 1/2 cups of milk
  • 2 eggs
  • 2 tsp. vanilla
  • 1/2 cup of butter, melted

Topping:
  • 1 cup of butter, softened
  • 1 cup of brown sugar
  • 2 Tbsp. flour
  • 1 Tbsp. cinnamon

Mix the milk, eggs, vanilla and butter.  Slowly add the dry ingredients until blended.  Pour into a greased 9x13 pan or fluted pan (I used a stoneware one). For the topping, mix all the ingredients together until well combined. Drop evenly over the batter and swirl with a knife. Bake at 350 for 28-32 minutes. (for approx. 50-60 minutes if using the Pampered Chef stoneware fluted pan)

For the maple cream cheese icing:
4 oz. (1/4 lb.) cream cheese, softened
3-4 tablespoons pure maple syrup
1/4 teaspoon pure vanilla extract
1-2 tablespoons milk
1-2 tablespoons of powdered sugar, to taste.
Beat the cream cheese with a hand mixer until smooth. Slowly add the maple syrup and vanilla. Add a few tablespoons of milk, then the powdered sugar, if necessary, so the frosting can be drizzled.  While the cake is still warm, drizzle the frosting on top. Serve warm or at room temperature.

Have your cake.


Monday, November 14, 2011

crossing the finish line

It's amazing how life can be so bright and then in an instant, can be darkened so quickly.  How at one moment someone could be running in a marathon, and the next moment, fighting for their life.

Last summer, after running in a triathlon, a parent and friend from our children's school was diagnosed with myelodysplasia (MDS), a form of cancer that affects the bone marrow's ability to produce proper white blood cells and platelets. The only cure was a stem cell transplant. 

His unwavering determination and faith helped him and his family work towards finding a donor, and a cure.  
A father of three and a veteran triathlete, he had the drive, determination and strong faith that he would find a donor and would be cured.  His prayers were answered, a life saving marrow donor was located, and the transplant took place.

Unfortunately, just a few months later, his body rejected the transplant, and his health deteriorated quickly.  He passed away Saturday night, surrounded by his loving family.

His passing is another reminder to live life to the fullest while you're here on this earth.  To hug and kiss your loved ones everyday, and at every chance, let them know you love them.  Sometimes it's the little victories that help you move forward. Sometimes it's what you and your loved ones need to make it through to the end.  Although our friend lost his battle to cancer, with the hearts of family and friends, he was a winner when he crossed the finish line.


Saturday, November 12, 2011

worth a thousand

{source: Kay Douglass}


Love the twig art on the wall.  I must DIY this!


Friday, November 11, 2011

a moment to remember


Today is a special day on two counts...it's Remembrance Day, and my husband's cousin is getting married.


Unable to go to the wedding due to scheduling conflicts, we are thinking about this young couple as they begin their journey on this monumental day.  How amazingly symbolic for this couple, that their guests can remember those in the past who sacrificed their lives so they have the freedom to enjoy the path to their future.


{Source:  Flowers Gallery}


Thank you to those who served, so we can all look forward to creating many beautiful moments to remember.


Wednesday, November 09, 2011

using your mussel


Do you ever look at a pile of dishes, laundry, homework, and lists of "things to do", and wonder how you'll get through the next hour, much less the rest of the day?

Then you just pull up your sleeves, use a little ingenuity, muscle, or just take a deep deep breath, you plow through your work, and get it done?

Motivation comes in different forms.  Sometimes we need to treat ourselves once in a while to help us move forward. Nothing feels like a better treat to me, than a nice meal, with a glass of wine.  A "fancy" restaurant meal, either at a restaurant or simply made at home to feel like you're treating yourself at the end of the day, can help you muscle through the trenches and cross the finish line.


Garlic Wine Mussels with Pasta
(adapted from Mario Batali's version)


Ingredients


  • 1/2 cup extra-virgin olive oil or butter
  • 4 cloves garlic, thinly sliced
  • 1 small onion, chopped
  • 1 cup dry white wine or chicken stock.
  • 2 pounds small mussels, scrubbed and debearded
  • 1 pound fettucine (box of 450g)
  • 1/4 cup finely chopped Italian parsley
  • 1/4 cup parmesan
  • Salt and freshly ground black pepper
Preparation
1. Bring 6 quarts of water to a boil in a large pot, and add 2 tablespoons salt.
2. In a 12-inch sauté pan, heat the olive oil over medium-high heat. Add the garlic and onions,  and cook until light golden brown, about a minute. Add the wine/chicken stock, raise the heat, and bring to a boil, then add the mussels. Cook, stirring and tossing, until all of the mussels have opened, about 4 minutes.
3. Meanwhile, drop the pasta into the boiling water and cook until al dente; drain well.
4. Add the pasta to the pan with the mussels and cook over high heat for 1 minute. Add the parsley and season with salt and pepper to taste. Sprinkle with parmesan and serve immediately.

Pour yourself a glass of wine, light some candles, and serve.  


{Attending these beautiful  parties...A Beach Cottage, At the Picket Fence, Nifty Thrifty Things}

Monday, November 07, 2011

pinkie swear


I promised my daughter (and "ahem", my husband), that I would finish one of my quick DIY projects, a new dresser for her room.  That "quick" project sat in my garage as I got carried away, with the usual busy autumn schedule...and just playing with the kids.  My biggest obstacle (other than my "distractions") was determining what colour to paint this dresser.


It's amazing how colour plays a role in how we feel. The kinds of emotions evoked by a simple colour on a wall or an outfit.   It's no wonder why interior designers choose neutral soothing colours to create rooms that evoke a sense of calm and serenity.

1.  Fill all holes (I used Lepage wood filler).  2.  Sand then wash down any residue.
3.  Prime.  (I used Zinsser's Cover Stain).  4.  Do a second coat of primer, if needed.

There is a psychology behind what colours mean and why we choose the shades we use, and this quote summed up what I was looking for.

"Pink is the color of happiness and is sometimes seen 
as lighthearted...an attraction to pink may speak 
of a desire for the more carefree days of childhood."

Carefree days of childhood.  That's what I strive to create for my kids...a place, a home where they can feel carefree and safe.  As an adult, it has a different, much stronger meaning...the pink ribbon comes to mind, and it represents a symbol of hope, strength and determination.

1.  Painted the dresser with Para's Cabinet & Furniture Paint in Sarah Richardson's "Blush" colour  
2.  Using a fireplace mantle ornament (found at Lowes for $10), sawed the ornament in 3 pieces.  
3.  Painted the ornament in the Para's Cabinet and Furniture paint,  also in "Blush".  
4.  Varnished using water based Varathane in Semi-gloss.


This is something I definitely want to instill in my children, especially my daughter. And it is with this determination, I finally put the finishing touches to this dresser, so my daughter has a made with love, place for her personal things.

1.  Varnished the dresser with water based Varathane, in semi-gloss.
2.  Glued the decorative ornaments onto the dresser, using LePage wood glue.
(I also added the knobs and handles....not shown)

Promises fulfilled... 


...and she's tickled pink!