Wednesday, December 31, 2014

climbing mountains


Usually at this time of the year, I try to clean up old files and sort through our photographs.  It's actually quite fun to go down memory lane to see what we've experienced, accomplished and enjoyed in the past 365 days.  I've seen so much growth in both of our children, and in ourselves, "the adults".

I remember taking the above picture last winter.  We spent a few days up north over the New Year holiday, and this was a particularly beautiful winter day with lots of sunshine, crisp cool air and fresh snow. We filled our days with skiing, tobogganing, trekking on snow trails and laughter.  So much laughter.


In the evenings, we headed back to the cottage cabin for some hot chocolate and warm comfort food. The kids were still full of energy and it seemed that our full days of activities didn't tire them at all (unlike their old mum!).  I remember asking them if they were tired from climbing "the mountain" (some of the hills felt as tall as a mountain).  They shook their heads and said "the higher the hill, the better the ride!"

As we approach 2015, this photo reminds me of that New Year's Day.  The moment when I realized our kids understood that hard work pays off.  Although I don't usually make resolutions, I begin this new year reminding ourselves that in order to enjoy the ride, you must climb the mountain first.


Wishing everyone all the best for 2015.

Happy New Year !!!


Make Ahead Banana Almond Bread Pudding 
with Chocolate Hazelnut Drizzle.
Recipe adapted & combined from
Chocolate Banana Bread Pudding and Baked French Toast


This bread pudding is a cross between baked french toast and traditional bread pudding.  It's worth the effort to make ahead of time...it's a wonderfully sweet morning treat and works well for a laid back New Year's Day morning, since can be easily placed in the oven while none of the creatures in the house are stirring.

INGREDIENTS:
  • 4 eggs
  • 2 ½ cups milk
  • ⅓ cup heavy cream (or ½ cup of milk of you don't have cream)
  • 1/4 cup brown sugar
  • 1 tsp. vanilla extract
  • 1 tsp. cinnamon
  • 1 tsp. nutmeg
  • 1 tsp. ground cloves
  • 6 cups cubed French bread (or about 15- one inch slices)
  • 2 bananas, sliced
  • Almond slices (to top with)
  • Brown sugar (to top)
  • Chocolate Hazelnut spread (like Nutella)...to drizzle on top.
DIRECTIONS:
  • In a large mixing bowl, mix eggs, milk, sugar, and vanilla and spices until smooth. Stir in bread, bananas (you can also stir in 1 cup of chocolate chips to make this extra sweet).
  • Pour into 9x13 greased glass baking dish and cover with tin foil.
  • Let the bread soak in the fridge for at least 1 hour or overnight.
  • When ready to bake, preheat the oven to 375 degrees.  
  • Top with almonds and sprinkle brown sugar on top.
  • Bake for 25 minutes covered with foil.
  • Bake another 25 minutes without foil, or until the knife inserted in the centre comes out clean.
  • If desired, slightly warm the chocolate hazelenut spread in the microwave for about 30 seconds. Drizzle.
Serve with syrup.  Enjoy.


Wednesday, December 24, 2014

merry christmas


From our family to yours, we wish you a very

Merry Christmas


Wednesday, December 17, 2014

happy face


Each year, the kids perform in their school's Christmas concert, and it's a busy week of rehearsals, costume preparations and a flurry of activity on the last week before the Christmas break.

This year, it felt like time rushed past us a little too quickly, as it seems like we were just adjusting to the new school year.  Now that the children are more and more involved with extracurricular activities, it becomes more challenging to dedicate what little precious time we have left, to prepare for the holidays. In the past, it is during this time of preparation...the baking, the decorating, when we participate as a family and talk about our year ahead, our year behind, or just about what we want to do during the holiday season.


Even though there is constant travel between regular school and work activities along with holiday events, I've found that we now have even more family conversations.  It is during our commute when I hear the funniest jokes, odd curiosities or reflective tales, spoken freely without intention or judgement, but rather just a casual chat to occupy the time while Mom is focused on driving the car.

Although we will continue to enjoy our some of our Christmas traditions...making gingerbread houses, baking cookies, ice skating at the local rink, I won't worry that we aren't "doing enough activities" with the kids this Christmas. Even on those days when we're not doing anything "special", we will choose to be present and in the moment during those precious times we have together...laughing, singing or just chit-chatting.  And watching their happy faces is special enough for me.


Cinnamon Infused Vanilla Cupcakes with Cinnamon Frosting 
(& gingerbread cookie topping)

These are cinnamon bun inspired cupcakes with cinnamon cream cheese frosting.  I made these for a party, and topped each cupcake with a gingerbread cookie for decoration {recipe, found here}, although these are pretty sweet without it.

Ingredients:

For the cupcakes:

  • 1 and 2/3 cups (210g) all-purpose flour
  • 1/2 teaspoon baking powder
  • 1/4 teaspoon baking soda
  • 1/2 teaspoon salt
  • 1 and 1/2 cups (300g) granulated sugar, divided
  • 1/2 cup (1 stick or 115g) unsalted butter, melted
  • 1 large egg
  • 1/4 cup (60g) yogurt
  • 3/4 cup (180ml) milk
  • 1 Tablespoon vanilla extract
  • 2 teaspoons ground cinnamon
Time saving alternate:
You can use pre-made white cake mix.  If you follow the instructions, replace the water with milk. )

For the cinnamon frosting:

  • 1 cup unsalted butter, softened to room temperature
  • 3 cups icing sugar
  • ¼  cup heavy cream (milk works too)
  • 2 teaspoons vanilla extract
  • 1 Tablespoon ground cinnamon
Time saving alternate:
You can use pre-made frosting.  Just mix in some of the cinnamon/sugar mixture into vanilla frosting, and add 3-4 tbsp of cream cheese to the whole frosting can.  Mix well.  (it tastes similar to cream cheese frosting for cinnamon buns).

Cinnamon Sugar topping/layer:


  • Mix ¼ cup of sugar with 1 tsp. of cinnamon.  (double the quantity if needed).
Directions:

Cupcakes
  • Preheat oven to 350F degrees. 
  • Line muffin tin with 12 cupcake liners. Set aside.
  • In a medium bowl, mix together flour, baking powder, baking soda, and salt. Set aside. 
  • In a large microwave-safe bowl, melt butter in the microwave. 
  • Whisk in 1 cup of sugar.
  • Stir in egg, yogurt, milk, and vanilla extract until combined. 
  • Slowly mix in dry ingredients until no lumps remain. 
  • Spoon about 2 tbsp. of batter into each cupcake liner.  
  • Sprinkle 1 tsp. cinnamon sugar mixture on top.
  • Top another tbsp. of cupcake batter on top of the cinnamon sugar mixture or until the liners are about 3/4 full.
  • Top each cupcake with 1 tsp. of cinnamon sugar.
  • Bake the cupcakes for about 20 minutes or until a toothpick inserted in the center comes out clean. Allow to cool before frosting.
Cinnamon Frosting:


  • Beat softened butter on medium speed with an electric mixer until smooth and creamy. 
  • Add icing sugar, cream (or milk), and vanilla extract.  Continue to mix.
  • Increase to high speed and beat for 3 more minutes or until really creamy.
  • Add more confectioners' sugar if frosting is too thin or more cream if the frosting is too thick.   
  • Add 1 Tablespoon of cinnamon and beat until combined, about 30 seconds.
  • Frost each cupcake.
If you wish, top with gingerbread cookies for decoration, or just serve as is.  Store cupcakes in an airtight container at room temperature for up to 3 days and in the refrigerator up to 5 days.

Enjoy!


Wednesday, December 10, 2014

shining star


We've been very fortunate to enjoy many holiday celebrations so far...gatherings with friends, stage productions, holiday festivities...taking it all in and enjoying each moment.

Last week, we had the privilege of watching a charming musical production of Cinderella, making it a family-only night of good food and entertainment.  During the intermission, one of the stage managers approached our daughter and asked if she wanted to go on stage to meet Cinderella in front of the live audience. Although my husband and I were enthusiastic and thought it would have been a fun opportunity for her, we didn't want to pressure her into any decisions and allowed her to go with whatever her heart felt.  Although she was flattered by the invitation, she kindly smiled, thanked the young gentleman and declined the offer.


Later that evening, she sensed our curiosity with her decision and as we were driving home, she stated that she really enjoyed kicking back and just watching the show with her family and didn't want to disrupt that time with us just for a few minutes of "performing and be the centre of attention".

Although the lure of the bright lights and audience applause was tempting for her to go on stage, her decision made me proud and amazed at how mature she has become.  She doesn't get easily dazzled or persuaded by what's flashy, but stood her ground with knowing what she felt was important to her at that moment and didn't need false admiration to fulfill her. 

As her parents, we know that the world will be our children's stage, with many more opportunities in the future for both our daughter and son to show how amazing they are. And when that time comes, we know in our hearts, that their star will shine long and bright, beyond any brief spotlight on stage.


Traditional Gingerbread Cookies
(makes approximately 4 dozen)

This recipe makes a crisp cookie, making it ideal to decorate gingerbread people with icing.  Light, simple and easy.

Ingredients
  • 1/2 cup butter, softened
  • 1/2 cup brown sugar
  • 1 egg
  • 1 tbsp. water
  • 1 1/2 cups unbleached white flour
  • 1/2 tsp. baking soda
  • 1/4 tsp. salt
  • 1 tsp. ground cinnamon
  • 1 ½  tsp. ground ginger
Preparation
  • Preheat the oven to 350degrees F.  Line cookie trays with parchment paper.
  • Cream the butter and sugar together, then add the egg and water, and mix until fluffy.
  • Stir together the dry ingredients:  flour, baking soda, salt, cinnamon and ginger.  
  • Add to the first mixture and beat until the dough is mixed.
  • Shape the dough into 2 equal sized rolls, flour your hands and the work surface, wrap in plastic wrap and chill until firm for at least 30 minutes.
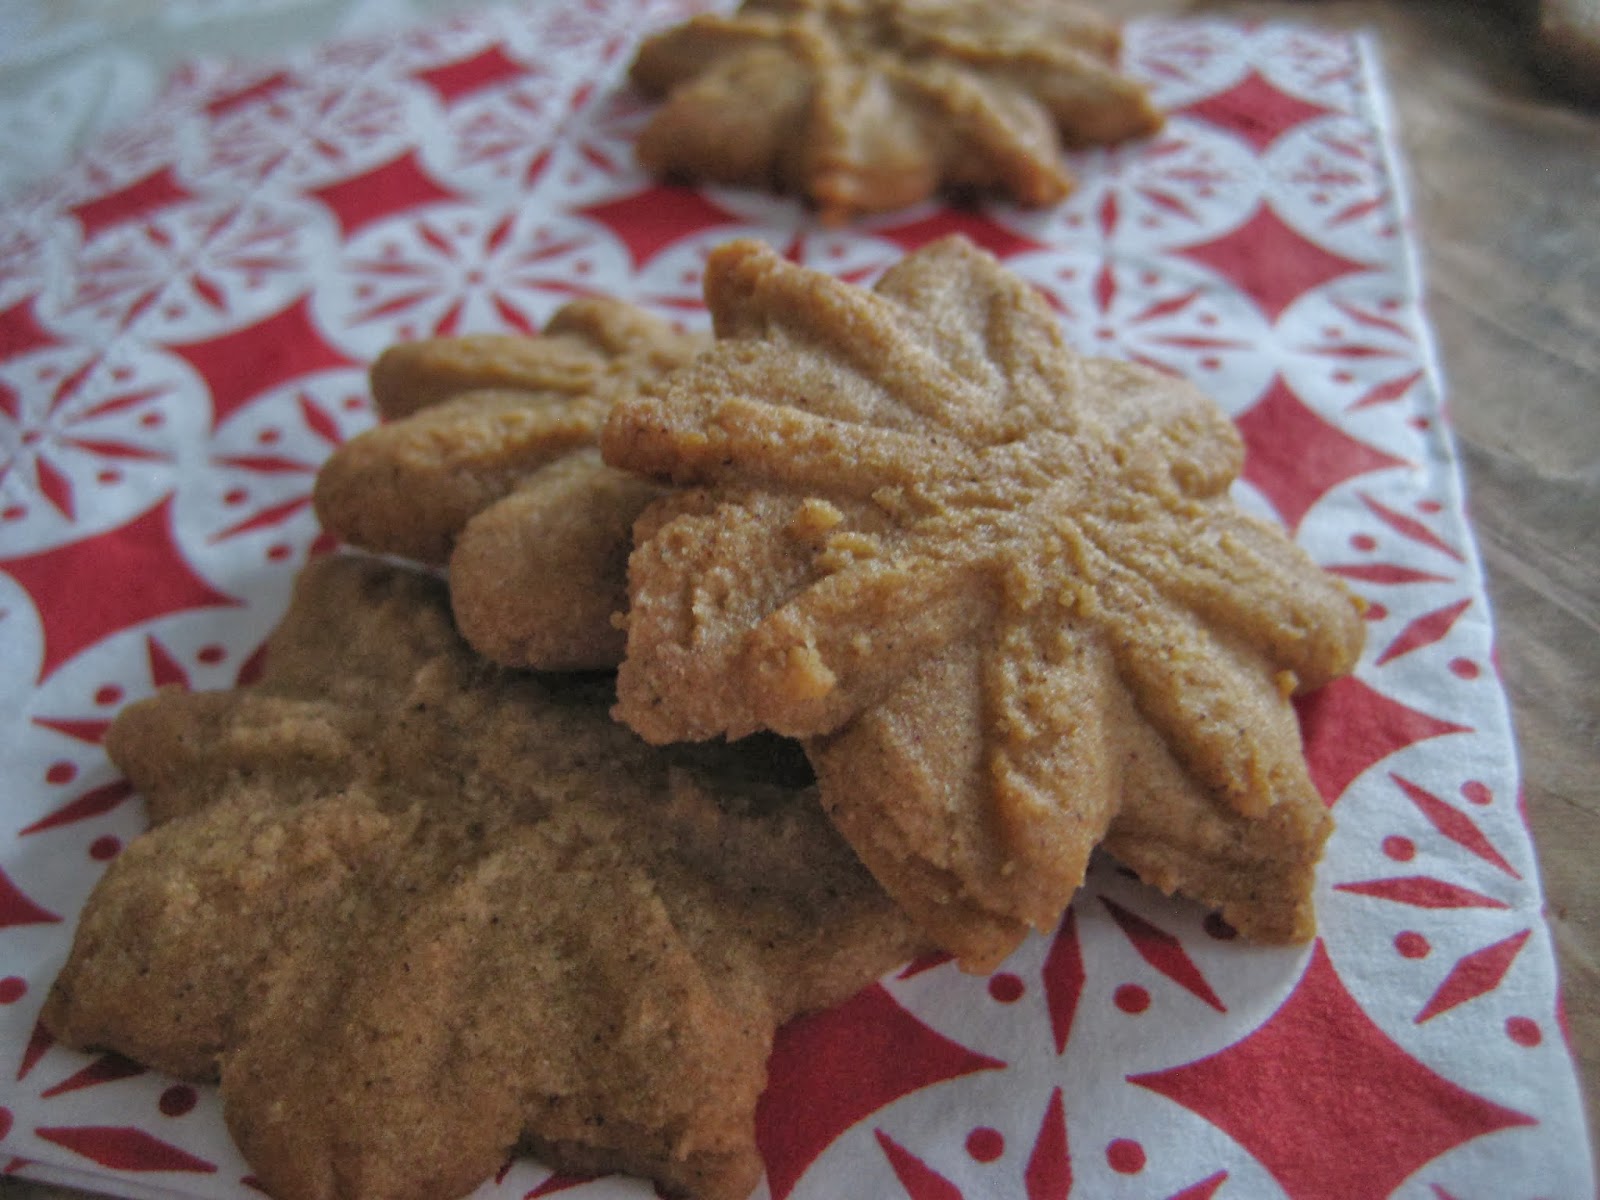
  • Place dough onto a lightly floured surface and roll to a thickness of about ⅓ to ¼  inch (the thicker the better for icing).  Cut out shapes (or put through a cookie press, as I used for the star shaped cookies above) and place about 1 inch apart on the cooking sheet.
  • Make the remaining shapes until all the dough is used.
  • Bake for about 10 minutes until the cookies are lightly browned.
  • Transfer to racks to cool
If you desire, you can decorate with icing.  Recipe found here: Christmas Past

Enjoy!


Wednesday, November 26, 2014

sounds corny


While I was growing up near Toronto, one of the traditions my family did every year, was to take a day trip to the Toronto Eaton Centre (a historical, six-storey glass-ceiling landmark built before outlets and super-malls ever existed) to see their annual showcase of Christmas trees and window displays.

On an early Saturday morning in December (stores weren't open on Sundays back then), my brother and I would rush through breakfast and our family would take an hour long drive to the Eaton Centre, wearing our snowsuits, hats and mitts (there seemed to be more snow back then), sweating in the car long before our arrival to the world's longest wait to get a parking spot at our destination.

Our parents then clutched our hands as we maneuvered amongst other excited children as we entered the front door of the big department store called Simpsons, where the Christmas trees were displayed. As a child, it seemed like a Winter Storybook/Wonderland was created, and my brother and I would visit Santa, stare in amazement at all the beautifully lit and decorated trees, pick out one special toy we wanted, and purchase as many presents on our lists for family and friends. We'd then go to the World's Biggest Book store next door to get a few Christmas books, then head out to Chinatown for a quick dinner before heading home. It was always a big and exciting day.

It was a Christmas ritual that faded as department stores closed or moved, and retailers put less effort into the magic of Christmas, and more into the commercialization of it.  Other than the craze for the Cabbage Patch Kids, the Star Wars Millennium Falcon and MonChiChi Monkeys (I dare you to Google down memory lane for that one), one of my most fondest memories weren't the toys under the tree, but the day when the Christmas season officially began for us...our trip to the Eaton Centre.

Now the Christmas season seems to begin when the flurry of ads for Black Friday sales dominate, enticing everyone to trample each other hurry in to get the cheapest TV, just in time for the Christmas season.  As much as I love sales, I wonder if we'll have a generation who will only associate the start of this magical season by the sounds of cash registers and hours of lining up at the mall.

Maybe it sounds corny, but as Thanksgiving is celebrated south of the border, I'll be thankful to continue our own holiday traditions, starting the season by making our annual gingerbread houses, setting up the tree on the first weekend of December and avoiding the aggravation of long line ups this Friday.

Tarragon Creamed Corn
(makes approximately 6-8 servings)


This is a great dish to go with turkey for the holidays.  The sweet corn balances the creamy texture, making it a comforting cold weather side dish.

Ingredients
  • 8 ears of corn on the cob
  • 2 tablespoons of butter
  • 2 small shallot, finely chopped 
  • 4 sprigs tarragon (or 3 tsp. of dried)
  • 1  cup heavy cream (I used table cream)
  • ½ cup grated Parmesan
Directions
  • Remove kernels from the corn (I find it easiest to cut the corn in half first, then with the flat end down, with a sharp knife, slice downwards to remove the kernels).  Set aside.
  • In a medium saucepan, melt butter over medium heat. Add shallot and cook until softened, 2 to 3 minutes. Add corn kernels and 3/4 cup water.  (When there is an abundance of corn in the summer, I cook the corn, remove the kernels and freeze them.  You can omit adding water if you use pre-cooked corn...just use the back of a spoon to press out the "juice" out of the corn)
  • Bring to a boil. Reduce to a simmer; cover, and cook, until corn is tender, 10 to 15 minutes.
  • Add cream, parmesan, tarragon; simmer, uncovered, until cream has thickened, 4 to 6 minutes. Season with salt and pepper. 
Serve.


Friday, November 21, 2014

the simple five: giving


After the Santa Claus Parade arrives and leaves town, it is a signal to start holiday preparations. Gift basket displays, festive music, non stop ads, enticing sales...reminding us to join the crowd as the hustle and bustle of gift shopping begins. 

Amongst the distractions, we should also try remind ourselves on how blessed we truly are, and remember to help those in need. Although it may be difficult to squeeze extra time into this busy season, here are five quick, simple and easy ways (that take very little time) to give back.  
  1. Donate to your local hospital. We are long-time supporters of the Sick Kids Hospital & Foundation. Their beautiful website provides many easy (and fantastic) ways to give. Send a card, enter their "lotttery", or just donate online.  Easy.
  2. Donate food to your local food bank. On your next grocery shopping trip, just add a few non-perishable items into your cart, and drop off a bag on your way out of the store. Many major chain grocery stores have donation bins right at the entrance, so it's easy to give.
  3. Help a senior in your neighbourhood. With all this snow, help shovel their driveway. It might be just an extra ten minutes of exercise (a health benefit for you...or get the kids involved!), but it's a small way that makes a big difference for someone else.  
  4. Donate toys to bring a smile to a child's face this Christmas. Many malls have toy drives/drop-offs (usually found at entrances or at customer service desks). Operation Christmas Child is a great way to bring a smile to a child overseas. Just fill a shoebox with necessities, school supplies and toys and drop it off at one of the many drop off locations. It's easy to fill up these boxes with readily available stocking stuffer-sized items, bringing a smile to children in need. You can also fill a shoebox online, if a drop off location isn't close to you.
  5. Buy gifts that "give back". Luckily there are items now available (in time for the holiday season), that are either made and/or sold by a nonprofit organization or a commercial company, which donates a portion of the proceeds to charity.  Right now, TOMS provides free shipping when you purchase items online. With every product you purchase, TOMS will help a person in need. (One for One ®).  So now you can skip the crowds, buy gifts online, and give back at the same time. Awesome!
Happy Giving.


{Disclaimer}: There were no endorsements with any of the charities or companies mentioned (or hyperlinked), for this post.  I just wanted to share the simple ways our family gives back, and a few of the beautiful  charitable organizations we support. All opinions are my own.

Friday, November 14, 2014

the simple five: chocolate avocado pudding


We love avocado in our house, and I often purchase bags of them for various dishes (my tomato avocado salsa is a house favourite).

Although my intentions are overly hopeful that we will consume all of the avocados in a week, on occasion, I have a few left that are on the cusp of being overripe.  

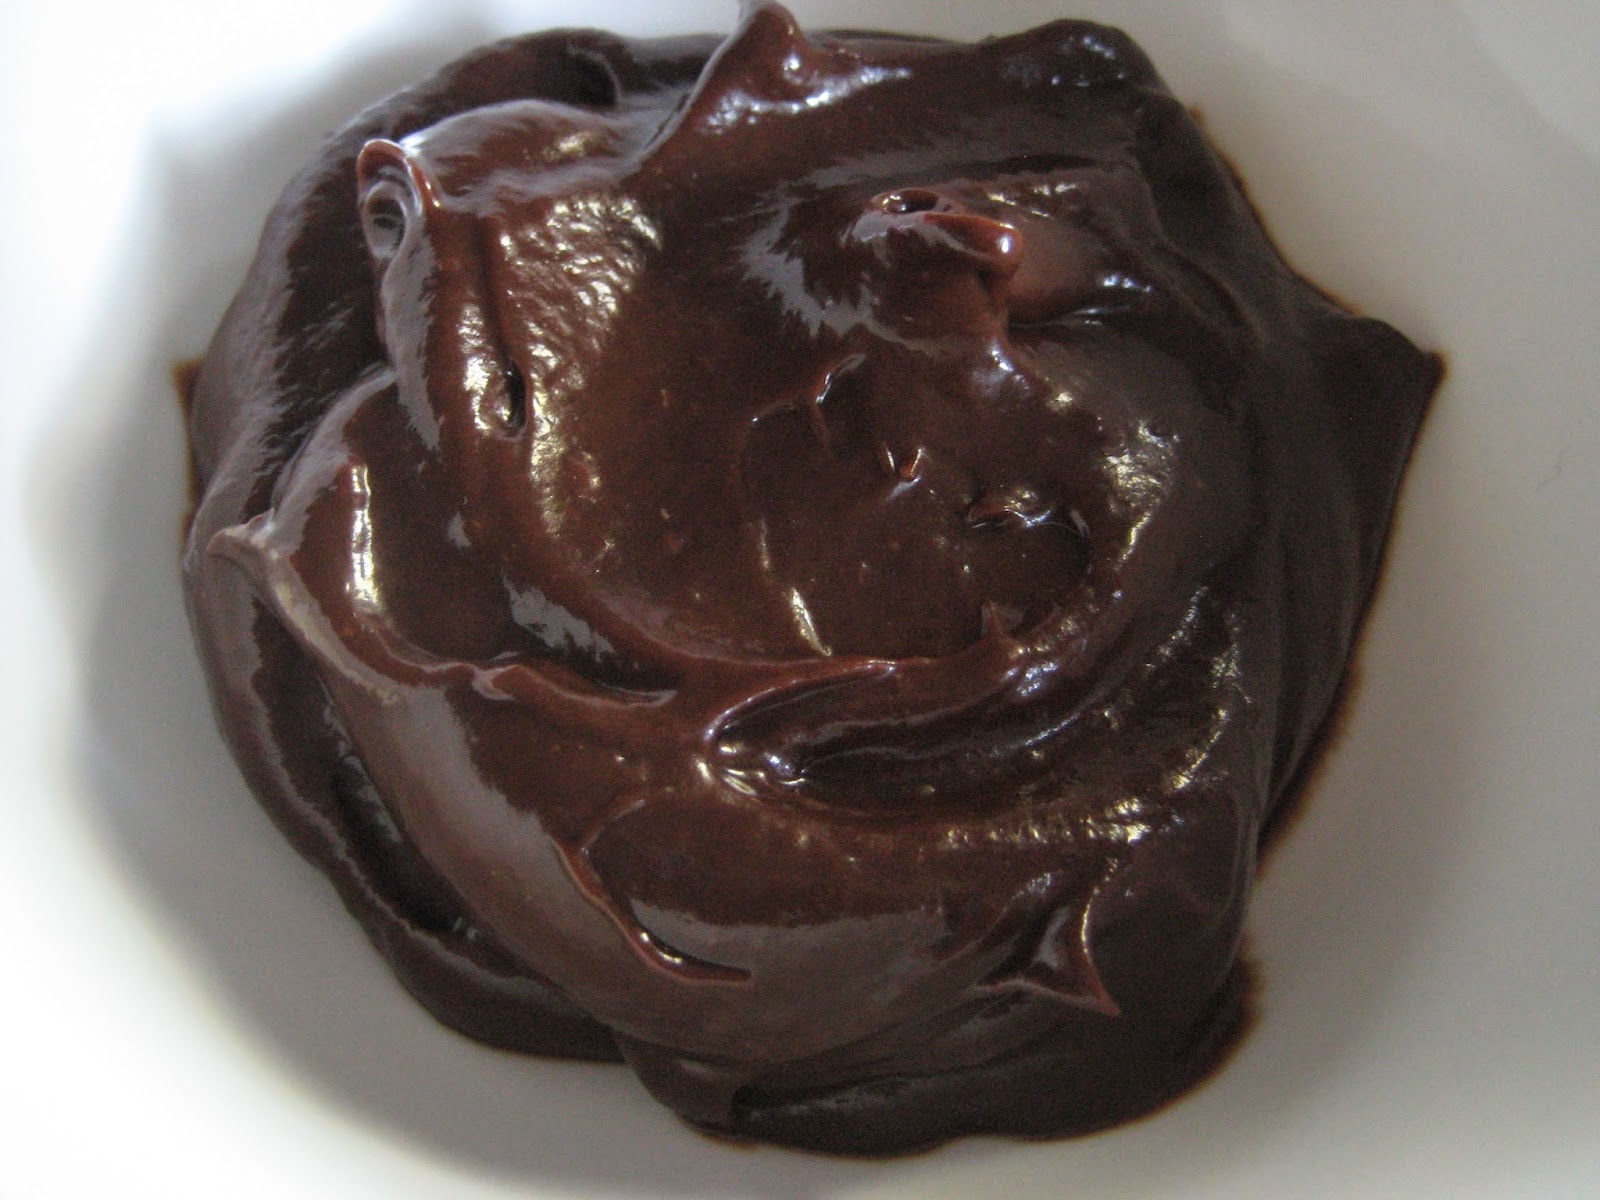
This simple recipe turns avocado into a sweet and relatively healthy dessert (you won't taste the avocado), and it is quite adaptable.  You can add more cocoa powder for a more intense chocolate taste, or you can add bananas, peanut butter or even apple sauce instead of brown sugar to add interest.  Or just increase the amount of sugar to make it more sweet.  This is a great way to have a chocolate dessert with the added health benefits of avocado.


Chocolate Avocado Pudding 
(makes approximately 4 servings)


Ingredients:
  • 2 avocados, peeled and pitted.
  • 2 tsp. vanilla extract (I also liked using almond extract).
  • 1 tbsp. of brown sugar (alternates: one whole banana , ½ cup of peanut butter, ¼ cup apple sauce.) 
  • ½  cup honey or maple syrup
  • ½ cup Organic cocoa powder (I like using the Camino brand).
Directions:
  • Place all the ingredients into a food processor (I just use a hand immersion blender, with it's blender attachment) and blend until creamy and smooth.  
  • Store in a sealed container for up to 3 days in the refrigerator.
Enjoy.


Friday, November 07, 2014

the simple five: candy bowl fudge


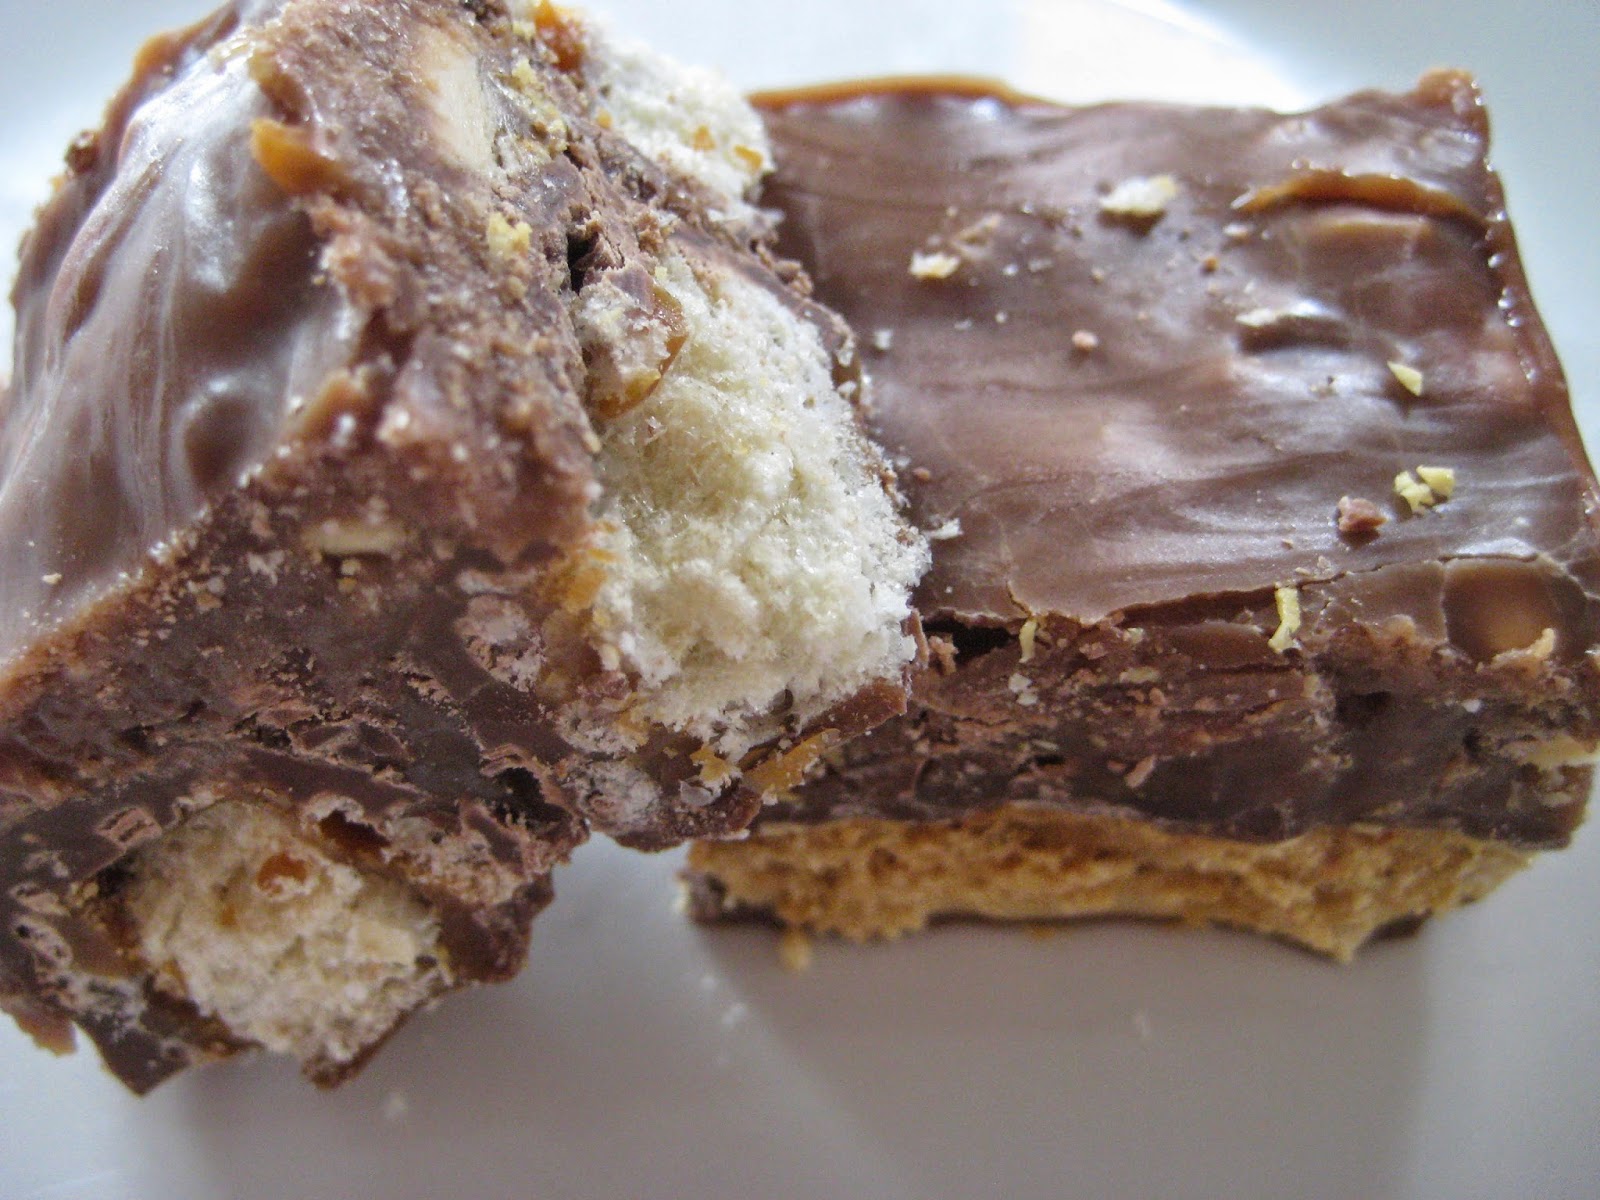
This uses up quite a bit of candy, which is ideal for any Halloween left overs (if you have any!).  This is not for the faint of heart or for those watching their calorie intake. It is very sweet. Although this will not lower your sugar intake, you can slow down the rapid consumption (by freezing this for later), and find less mini-wrappers tucked in secret places in your furniture...


Candy Bowl Fudge
(makes about 8-12 servings).
{fudge pictured on the left has Mr. Big bars for the bottom layer,
fudge pictured on the right has Crispy Crunch bars for the bottom layer.}


Ingredients:

Bottom layer
  • Approximately 32 mini chocolates (those with a cookie or peanut centre work well...Crispy Crunch, Mr. Big, KitKat).

Fudge
  • 2 cups plain chocolate (about 26 mini bars...I used Caramilk & Aero bar)
  • 1 can sweetened condensed milk
  • 2 tsp. vanilla
  •  ½ cup chopped walnuts (or substitute with chopped bars with nuts...I used 6 mini snickers bars, chopped).  You can also use chopped Smarties or any candy coated chocolates.
Directions:
  • Line a 8x8 pan with parchment paper, leaving about a 1" overhang from the edges of the pan.
  • Take bars and line the bottom of the pan. (You can make them all uniform or vary the kind you use.  Half of my pan was was lined with Crispy Crunch, the other half, Mr. Big. (KitKat would work lovely too...unfortunately those were all eaten by the time I made this!).
  • Chop plain chocolate (Caramilk/Aero) and place in microwave safe bowl with condensed milk.
  • Microwave on hight stirring twice until chocolate is soft, 2 minutes.  Remove and stir well.
  • Stir in vanilla and chopped walnuts (bars with nuts).
  • While hot, pour over the lined pan of chocolate.  
  • Refrigerate for 2 hours or until firm.
  • Using the parchment paper, lift the whole fudge out of the pan and cut into 1" squares.
  • Fudge stored at room temperature in an airtight container will last up to 10 days. Fudge stored in the refrigerator can last 2 to 3 weeks. (or 3 months in the freezer in an airtight container).
Go to the dentist.


Friday, October 31, 2014

the simple five: quick zombie makeup


For those who have been undecided on whether you'll participate with the candy hunt this evening (ughh, it's raining and cold!), here's a quick last minute costume idea, if the decision is to "go".  Although it's not the most "accurate" in terms of zombie creations, it will suffice for the mere 20 minutes that the kids will be walking around the neighbourhood.  Good enough for me.


Quick Zombie Makeup/Costume

Items you'll need:
(most items can be found in your kitchen, pantry, or at the local store)
  • Red Food colouring 
  • Corn syrup
  • Makeup sponges
  • Gauze bandage
  • Black and white face makeup (inexpensively found, or you can use white/black cream eye pencil).

Directions:
  • First, get dressed in old, dark clothing. (the red food colour can stain your clothes).

  • Using a makeup sponge, cover the face with white makeup.
  • Under the eyes and patches on the cheeks, smudge some black makeup/eyeliner, blending it into the skin.
  • Mix 3 parts corn syrup to 1 part water (I used about 3 tbsp. corn syrup and 1 tbsp. water) in a bowl until the consistency is smooth but still thick (you can use cornstarch to thicken to make "blood clots", if you wish).
  • Slowly add drops of red food colour until it is the colour you desire (sometimes adding a little green will make the red appear darker).
  • Using the makeup sponges, dab the red colour mixture lightly on the skin (around the mouth and cheeks) and drop a little on the gauze bandage.
  • Wrap the bandage around your head.

Done.  And since the weather is usually cold, any warm, old clothes would do (the older the better) to complete the zombie look.

Have fun...be safe.  


{For those who are interested in making the hippo costume in the above picture, please refer to my Hip Hippy Hooray post.  It is not a last minute costume...you'll need to give yourself a few days to complete it.}


Wednesday, October 22, 2014

bark loudly


A little while back, my son had a few friends over to play video games, throw the ball around at the park and just hang out.  Unfortunately with a last minute cancellation, our daughter's original plan to spend the day with a friend didn't materialize.  She was very disappointed.

It is no secret in our house that our little girl loves anything sweet. As if she's not sweet enough! So while the boys played, I promised her that we'd make some kind of candy to pass the time.  Just the two of us. As I was saying this, I wished I stopped myself from making this promise as I didn't want her to be disappointed (again). How am I going to make candy? I don't have any ingredients unless we made caramel sauce (but no ice cream to top it with) or fudge ("not interested" she said).


All of a sudden, our dog started barking loudly (and for no reason...bird? squirrel?).  The continuous yelping at small critters usually bothers me, but for some reason it felt like our pup was trying to tell us something, giving me a great idea. Throughout the continuous barking, I told our daughter that our pup was suggesting that we make "bark", and with her eyes widening with enthusiasm, she gave an astounding "yes" and hugged our dog in appreciation for the good idea. Our dog finally stopped barking.

Since I usually don't make bark unless it's Christmas, I had forgotten how quickly and easily one can have such sweet goodness in a few hours.  I just used what I had on hand...a half a package of semi-sweet baker's chocolate, half a bag of white chocolate chips and half a bag of toffee bits.


Our little girl had the greatest time watching the different coloured chocolate mix together, creating a beautiful marbled look.  Her sadness with the cancelled playdate quickly dissolved as she licked the bowls clean. She had the biggest, stickiest smile on her face.

I guess we had a sweet day after all and maybe I should thank our pup...


...for barking loudly.


Marble Chocolate Toffee Bark
(Makes enough to serve about 4-6 people).

This is the easiest and quickest chocolate bark. Ever.  Not sure if this really constitutes as a recipe, but here we go.

Ingredients
  • 4 squares of Baker's Semi-Sweet Baker's Chocolate
  • 1 cup of white chocolate chips
  • ½ cup of toffee bits, plus more to top (I used the "Skor" brand, but you can use any kind of candy you have on hand).
Directions
  • In two separate small bowl, place the baker's chocolate in one bowl and the white chocolate chips in the other.
  • Set your microwave at 50% (medium) and melt the chocolate for about 2 minutes.
  • Remove and stir quickly.  If it's not melted, then put the bowls in the microwave and melt again at 50% for another minute.
  • Remove.  In the bowl with the baker's chocolate, stir in the toffee bits.
  • On a baking sheet, place parchment paper.
  • Spread the white melted chocolate on the parchment paper.
  • Spread the baker's chocolate on top.  Using the spoon, swirl the two chocolate together.
  • Top with a few more toffee bits (optional), to taste.
  • Place the cookie sheet in the fridge for at least 3 hours.
  • When the chocolate has hardened, break into pieces (you don't have to be precise...it looks better when you just cut it any way you wish).
  • Keep in a sealed container, in a fridge for up to 5 days.

Enjoy!


Wednesday, October 15, 2014

sweeter than pie


As kids get older, the life lessons they learn tend to get a little more complicated, tasting more sour than sweet. More than ever, it becomes increasingly difficult to stand aside as our children work out their own inner turmoil and unravel the mysteries of life without parental interference. As parents, we spend so much time building our children's wings that we forget to let them try on their own to fly.

Amongst Thanksgiving and birthday celebrations, our son has eagerly anticipated two significant sporting events: a cross country running race and his first swim meet this week. Along with honour band rehearsals, reading assignments, running and swim practices, on top of his regular school work and social life, he's had a lot to manage.

On the morning of his cross country race, our son was extremely anxious and worried that the increased distance he had to run this year (an extra kilometre!) would dampen his chances of doing well and earning a place at the next regional race (only the top 15 get to go). As scenarios began to run in his mind, he started to question his decision to enter the race to begin with, and my witty sweet boy became extremely silent, as if he was transported elsewhere.


We persevered with the morning routine and like a true athlete he became laser focused once we arrived at the running track. Before his race, very few words were spoken as he walked off on his own and collected his thoughts around the track. Although he was able to see and catch up with his friends from other schools, for the most part, he walked to clear his mind and get ready for the event.  Then it was time to gather at the starting line. As tempting as it was to give him one big hug before the race, I stayed behind, standing at the bleachers to give him the space he needed.

When his category began their race, in the distance I could see him run amongst the pack of about fifty kids-with-much-longer-legs-than-him. He held back and for the longest time was in 12th place.  My heart started to sink as it was now my turn to run scenarios in my mind about what he was thinking. Did he lose his motivation?  Is he tired?  Did I feed him too much/too little this morning?


The group was out of sight on the other side of the tracks, and for about what felt like forever ten minutes I didn't know where he was in the race. Did he fall behind? Did he go ahead? Did he stop?

Then I saw the lead runner cross the finish line. Then another. Then a group of five boys appeared around the corner, one of which was my son. As his running coach came to stand beside me with a smile and a "where-did-he-come-from" look, we watched as my son crossed the finish line in the top five! His face lit up like the sun.


On the drive home, he was still quite silent. His body was in pain from over-exertion and he closed his eyes to rest. Once we got home, I could tell he was replaying the race in his mind and with a big sleepy smile proclaimed "It was the best race I've ever ran. I really had to work hard and I'm proud that I was able to still finish strong. I'm totally pumped for my swim race this weekend".

It was at that very moment when I saw a different kind of maturity in him.  His accomplishment at the race taught him that all his hard work paid off because he stayed determined, focused on pushing through the jitters, trusted his own abilities then put his best foot forward.

This young gentleman is learning to fly on his own...


..and learning that lesson is so much sweeter than any possible gold medal or dessert he'll ever have.


Sweet Apple Galette
(makes two galettes, serves approximately 6-8 people).


Like apple pies, you can make this (without baking it), and FREEZE this. You can also make this a day ahead if kept in a container and refrigerated.  If baked from frozen, then bake for about 10 minutes longer, and make sure you use an egg wash on the crust to prevent burning (I also use the pie crust edge shield for this). The caramel filling makes this galette fairly sweet.

Ingredients
  • 8-10 medium sized apples, peeled and thinly sliced
Crust
  • 3 cups of all purpose flour
  • ½  cup butter
  • 2 ½ cup vegetable shortening
  • ½ tsp. salt
  • ½ cup of ice cold water
Caramel Filling
  • 3/4 to 1 cup brown sugar
  • 6 tbsp. flour
  • 1 ½  cup brown sugar
  • ½ cup of water
  • 1 tsp. ground cinnamon
  • Pinch of nuteg
  • ½ tsp. allspice
Whipped cream, if desired

Preparation

Make the crust first.
  • Whisk the flour and salt together.
  • With a pastry blender, cut the butter and shortening until the mixture looks like pea sized crumbs.
  • Drizzle the water slowly over the flour until mixed.
  • Form the dough into a ball and refrigerate (for at least 30 minutes...you can do the apples and caramel in the meantime.)
Peel and slice the apples and set aside.

Make the caramel.
  • Melt the butter in a large sauce pan
  • Stir in flour to form a paste.
  • Add sugar, then water and bring to a boil
  • Remove from heat and add the spices, continually stirring.
  • Toss the apples into pan of caramel sauce, until evenly coated.
Assemble:
  • Roll out the crust dough into two round discs onto parchment paper, approximately 1" thick (and approximately 12" in diameter).  
  • Place the rolled out dough into two pie dishes.
  • Put half of the apple mixture into the centre of each of the pie crusts, leaving a one inch edge.
  • Fold the edges towards the centre.  You don't have to be neat...it looks more rustic if it's not perfect!  Or tuck the edges in for a more neater presentation.
  • At this point, you can wrap with the parchment paper, and refrigerate (or freeze).
  • When ready to bake, remove the galettes off the parchment paper and back into the pie dishes.  (You can place on a silpat and then on a baking pan, but this way if there is any spillage from the apples, it the crust will remain it's form.
  • Brush a little milk onto the crust.
  • Bake at 400 degrees for 35-40 minutes (or 45 minutes if frozen), until golden brown
Serve warm or room temperature, with whipped cream or vanilla ice cream.


Wednesday, October 08, 2014

pockets of gratitude


While busily driving around the city to do errands the other day, I saw a chicken cross the road.  There are no farms in the area (so I have no idea where this chicken came from) and many cars had stopped traffic to let it cross, as if this was commonplace. I guess we Canadians are familiar with poultry crossings, as we similarly allow flocks of Canada Geese to cross the road when necessary.  Amongst the ever growing list of the things I had to do that day, the thought about that age old joke about chickens and roads distracted me long enough to realize how funny it was to actually see a chicken cross the road, and I couldn't stop laughing in the car all the way to my next destination.

With Thanksgiving this weekend, the holiday makes us think of all the things we're thankful for. It's one of my favourite holidays of the year. A gathering of loved ones, sharing the coziness of a hot, deep-sleep inducing meal and spending time creating familiar memories.  I say familiar, because I usually cook the same menu, and ask my guests to bring the same food item year after year.  The familiarity of this tradition provides the comfort of consistency. 


However, I've been thinking a lot lately about gratitude. Maybe we should really be more grateful, taking note of perhaps the small but accumulatively important things that we have in our lives.    Being grateful allows us to slow down and really take notice of what is staring us in the face, every single day.  Like watching beautiful sleepy faces in the quiet of the night. Or the glorious sunshine warming our earth. Or the beauty of mature trees reflected on a calm, still pond.

Being thankful requires a giver and receiver, where we owe that moment, or gift, to someone else for providing it. I'm sure that chicken is thankful that all those cars stopped to let it cross the road.  But being grateful allows you to feel the warmth of happiness at any moment within yourself without waiting to be thankful for something given to you by someone else.


So this year, I'm going to try to be more grateful. Yes, I'll still be thankful for the delicious food on our table. Thankful for being able to spend time with family and loved ones. Thankful for the time off of work to be able to enjoy all those things. But I'll also acknowledge the simple little moments. Grateful for restful children that allow me a few extra hours in the morning so I can prepare for the feast. Grateful for beautiful weather so the commute to our home is safe and enjoyable.

And on an otherwise busy and hectic day, grateful for catching that funny glimpse of that chicken crossing the road and putting a big smile on my face.


Happy Thanksgiving


Turkey Pockets
Serves 4-6 people


This is a great recipe for using left over turkey from Thanksgiving.  You could also use chicken instead (for other times of the year).

Ingredients
  • 2 or 3 cups of cooked turkey, diced. 
  • 1 and ½ tablespoon unsalted butter
  • 2 tablespoon all purpose flour (optional)
  • ½ teaspoon black pepper
  • ½ cup Corn and peas (optional)
  • ½ cup milk (you may need 1 - 2 tablespoons more)
  • ½ teaspoon Herb de Provence 
  • ½ teaspoon Poultry seasoning (optional)
  • Puff pastry sheets (1 used 10 pastry squares - 6 x 6 inch)
  • 1 egg, lightly beaten
Directions
  • Heat a saute pan with the butter until melted, add corn & peas until cooked.  
  • Add the flour, black pepper. Whisk to mix everything and let cook for 2 minutes. 
  • Add half the milk, then all of the turkey, then the remaining milk. 
  • Cook for a 3 - 4 minutes until the milk reduces. 
  • If the mixture is too dry add 1 - 2 more tablespoons of milk. 
  • Season with Herb de provence or poultry seasoning (or both)
  • Let cool completely.

To prepare the puff pastry shell:
  • Defrost puff pastry shells at room temperature for 30 minutes. Cut squares into triangles, fill one side with 1 tablespoon of mixture. 
  • Fold 1 side of the pastry over the filling and crimp the two sides with a fork. 
  • Repeat with remaining shells. If baking right away, brush pastries with lightly beaten egg.
  • Line the pastries on a parchment lined baking sheet and bake at 350 degrees F for 15 - 20 minutes or until pastries turn lightly golden brown. 
Enjoy.


Wednesday, October 01, 2014

mini versions


For as long as I can remember, I've always envisioned owning a treehouse.  A quiet little spot for the kids to huddle with friends, dreaming about the future.  A serene place for me to sit up high above the ground to gather my thoughts and write. A "secret" hideout to toast the end of a busy workweek with a glass of wine with my husband or sharing giggles with friends. There's something magical about the solitude of watching the world with a bird's eye view.

Last weekend, we were able to get away for a short jaunt up north and enjoy a little bit of sunshine.  Although the above seasonal temperatures felt like summer, the burnt orange and red leaves were a reminder to enjoy every bit of this last little stretch of warm weather.

The kids had a blast spending time outdoors, roaming for sticks for a marshmallow roast and bonfire, climbing trees and biking on the trails.  Our daughter in particular, closely examined about a dozen trees, deciding which one would be most suitable to climb, which at first I thought, so she can go as high up the tree as her brother.


As we watched the kids, I pondered if we should build a treehouse, sparking a discussion that had us wondering if the kids will soon be out of the "treehouse" stage. My husband thought the kids (much sooner than I would think) would soon outgrow the enjoyment of a treehouse.

Although I agreed at the moment...deep down, I wasn't sure if I have ever outgrown that "treehouse" stage.


After a lengthy search, once our daughter found "the tree", she didn't climb to the top, but sat on a branch that seemed to fit perfectly around her body. On both days of the weekend, she headed towards that tree and spent hours sitting on that limb with a notebook and pencil in tow, writing stories.  She was content to sit for hours in that tree, examining the bark, watching the sunset, writing and drawing in her little book.

Although it's pretty obvious in our house, that our son's personality is more similar to mine...analytical, results driven, inquisitive, and our daughter has the imaginative, fun loving, story-telling spirit like my husband, this past weekend, there was a glimmer of me shining through our daughter.  The part of me that relishes quiet surroundings, taking notes to archive the details, and creating our own little magic with the inspiration of nature.

I wonder if she will keep that part of me and forever embrace the creative process that is driven by solitude. There is nothing more that I want to teach to both of my kids, than to learn to tune out the noise of this crazy, fast paced world surrounding us and truly find and listen to the beat of your own heart.


No one can predict which hidden gems within our souls as parents, will be revealed later in our children.  And as easy as it is to find ways that our children are mini versions of ourselves (which unfortunately prompts many parents to fulfill their own dreams vicariously through their kids), maybe we just need to recognize that this might be a brief point in time when they are just mirroring us.  Exploring, testing, fulfilling their own desires so they can find their own branch that is strong enough to withhold the weight of their world.

As I watch with my own "bird's eye view", my amazing kids discover their world, I'm confident they will find their own way to climb to the destination of their choice, one that suits their needs best.


And maybe they won't want us to build a treehouse for them after all.


Mini Pumpkin Pies
(makes 24 servings)


This recipe is adapted from the back of the Farmer's Market Foods pumpkin puree can.  I added a little more spice, and made my own easy pie crust, which is buttery, flaky, and added a lot of dimension to this recipe.  If you don't have time to make your own crust, store bought versions would work too.

Ingredients:
  • 1- 15oz can Farmer’s Market Organic pumpkin (or just under 2 cups)
  • 1 ½  tsp ground cinnamon
  • ½  tsp ground nutmeg
  • ¼ tsp ground ginger
  • ¼ tsp ground cloves
  • ¼ tsp. allspice
  • ½ tsp salt
  • 1 can sweetened condensed milk (300ml/14 oz)
  • 2 eggs, slightly beaten
  • 1 9” pie shell or pastry dough (I used my homemade pie crust recipe, found here)
Preparation:
  • Mix pumpkin and spices together. 
  • Slowly beat in the milk and eggs, until just mixed.
  • Follow the directions for making the pie crust.  If using prepared curst, roll out the dough.
  • Using a round cookie cutter, make about a 24 circles.
  • Line a muffin tin with cupcake liners then place the crust circles in a muffin pan.
  • Add the pumpkin filling in each crust (about 2 tbsp.)
  • Bake at 400º for 15 minutes, then reduce temperature to 350º and bake for an additional 20 minutes. 
  • Let cool. 
Serve and enjoy!


Friday, September 26, 2014

the simple five: baked sausage penne


This recipe was made on a whim.  It just so happened that I had sausages and was stumped for a quick and comforting dinner.  This five ingredient recipe took less than an hour to make.

Enjoy!


Baked Sausage Penne Pasta
Makes 6-8 Servings
Adapted from Taste of Home


Ingredients
  • 454g penne (Rigatoni works too)
  • 5 Mild Italian Sausage Links links, sliced (I used Whole Foods Organic Sausages, mild)
  • 1 jar (750ml) spaghetti sauce...I used Neal Brother's Garlic Tomato Sauce
  • ¼ cup chicken stock
  • 2 cups shredded mozzarella cheese (I shredded mozzarella, gruyere, parmesan and applewood smoked-but if you want to stick with just 5 ingredients, mozzarella works great on it's own too).
Directions
  • Cook penne pasta according to package directions. 
  • Meanwhile, in a large pot or dutch oven, cook sausage over medium heat until no longer pink; drain the fat.
  • Return to the stove and add spaghetti sauce and chicken stock.
  • When pasta is cooked, drain and add to sausage/sauce mixture and toss to coat. 
  • Transfer to a greased 13-in. x 9-in. baking dish
  • Sprinkle with cheese. 
  • Bake, uncovered, at 350° for approx. 20 minutes or until cheese is melted.
Serve.


Friday, September 19, 2014

the simple five: slow cooker steel cut oats


To start my new "Simple Five" series, I thought I'd begin with a recipe that helps simplify the start of the day.

The chilly, late September morning temperatures are just a hint of what is to come.  Like a practice run, it prepares us for what will likely be around the corner...longer, more difficult mornings with a lot of reluctance to get out of a cozy warm bed. So, to combat this, I've started serving a warm, belly-filling (and healthy) breakfast to start the day.  This is a five ingredient and five minute breakfast (if you do the prep work before hand), so it's a"Simple Five"...times two!  In a slow cooker, I make these steel cut oats (using five ingredients, but it's flexible and you can add more!) and store them covered in a loaf pan, in the fridge, for up to a week.  Slice desired amount every morning and heat in the microwave for a nutritious quick breakfast.  Place this into a thermos or container, and you're ready to take this to go.

Enjoy!


Slow Cooker Steel Cut Oats
(makes 4-8 servings)


Ingredients
  • 2 cup steel cut oats (I used Whole Food's 365 Steel Cut Oats).
  • 5 cups water
  • 3 cups 3% milk (2% works fine too)
  • 3 tbsp. of desired spices/seasonings (I used 1 tbsp. organic cinnamon and 2 tbsp. brown sugar)
  • 3 mashed bananas
Directions
  • Put all the ingredients into the slow cooker.  
  • Cook on low for 6-8 hours. 
  • Place in a loaf pan or covered glass dish and store in the fridge (for up to a week).
  • Slice the amount you require in a bowl and microwave for about 1-2 minutes, depending on quantity. 
  • Stir.


Serve with berries, add a little more milk (if you desire a thinner consistency), and/or maple syrup.  And for all you Nutella fans, drizzle a teaspoon (or more) of warmed Nutella on top of this. It tastes like a chocolate banana cake (well, at least a more healthy version of it!)