Showing posts with label Recipe. Show all posts

Friday, October 09, 2015

the comfort of thanksgiving


Now that it's officially autumn, relaxed beach visits of the summer are a distant memory as we start to seek the warmth and comfort of the season.  If the beginning of September is a symbolic way to hit the restart button as we dive into new school routines, then October, especially during the Thanksgiving season, is when we start settling into the comfort zone.  It's when we really reflect our home, and our busy world surrounding it.

It's been an interesting time as I've started spend more time offline than online.  The summer was a refreshing start to cleanse any old baggage and start the school year with fresh eyes and settle into a new routine.  The quest to disconnect for most of the summer meant that I could enjoy much more deeply, what is most meaningful in our family.  And I think I like this new focus.


The heart is where the home is, and there is something very comforting about the food made for holidays like Thanksgiving that speaks to my heart.  Certain scents like turkey in the oven that make a house smell like a home, and all the love of family gathered together for this special time.

I generally don't make stuffing as it's on the list of things that my Mom brings for our annual Thanksgiving dinner.  (she makes an excellent rice/sausage/bread stuffing...I need to get that recipe!).
However, on a whim, I decided to make this corn bread stuffing to go with a chicken dish.  It's a hybrid of various dressing recipes, and although I love my Mom's rice stuffing, this is quickly becoming a favourite too (especially since there are many corn bread lovers in this house).

To all my family, friends and Canadian readers...


Happy Thanksgiving weekend!!!


Cast Iron Skillet Corn Bread Sausage Stuffing

You can purchase premade cornbread for this recipe.  I made two batches of cornbread from scratch in my cast iron skillet (using this cornbread muffin recipe, here). One batch was used for this recipe and the other one I froze to enjoy at a later date.

Ingredients
  • 1 pan cornbread (8-inch square), cut into 1/2-inch cubes
  • 8 slices white sandwich bread, cut into 1/2-inch cubes (I used 3 dinner loaves...white, pumpernickel and whole grain).
  • 4 slices bacon, cut into 1-inch pieces (I used honey garlic maple sausage 500 g package or one or two 375g package of breakfast sausages)
  • 1 small yellow onion, diced small
  • 2 stalks celery, diced medium (optional)
  • 2 cloves garlic, minced (I used roasted garlic)
  • 1 tablespoon finely chopped fresh sage leaves (1 tsp. dried sage)
  • 2 large eggs, lightly beaten
  • 2 3/4 cups chicken broth (I used turkey broth)
  • 1/2 cup chopped fresh parsley
  • Coarse salt and pepper
  • ¼ cup of dried cranberry (to taste...I used about ¼ cup)
DIRECTIONS
  • Preheat oven to 375 degrees. 
  • Spread cornbread and bread on two rimmed baking sheets and bake until dry and golden, about 20 minutes. (you an do this ahead of time...just place toasted bread in a sealed ziplock bag for up to 2 days).
  • Meanwhile, in a 10" cast iron skillet, cook sausage over medium until fat is rendered and meat is browned, about 5 minutes. 
  • Add onion, roasted garlic and cook until translucent, about 4 minutes. Stir in sage and transfer to a large bowl. (I used a stock pot...didn't have large enough bowls!)
  • Add toasted cornbread & bread, eggs, broth, parsley, 1 1/2 teaspoons salt, and 1/2 teaspoon pepper to bowl and toss until combined. Let sit 5 minutes, then toss again, this time with the cranberries (if using).
  • Spoon stuffing back into the cast iron skillet. 
  • Bake until top is golden brown, 20 to 25 minutes.

Wednesday, April 22, 2015

the simple five: chocolate hazelnut fudge


Fudge is one of those sweet pleasures that taste rich and satisfies a sweet tooth with just a small piece.
The sweetness of fudge often evokes that feeling of homemade treats.  I love visiting countryside bakeries that serve homemade treats. One can often find handmade fudge wrapped in saran wrap with a handwritten price sticker, offered on the counter.

When I make fudge, I like to switch the ingredients, using a variety of flavours (like maple or butterscotch).  However, this chocolate hazelnut recipe is a favourite in our house.

Enjoy!

Chocolate Hazelnut Fudge
(makes approximately 12-16 servings).

Ingredients
  • 2 cups of semi-sweet chocolate (you can use baker's chocolate or chocolate chips).
  • 3 tbsp. unsalted butter (optional, if you prefer a buttery fudge).
  • 1 can sweetened condensed milk (150ml)
  • 2 tsp vanilla extract
  • 1 cup chocolate hazelnut spread (organic, homemade or Nutella)
Preparation
  • Line an 8×8 inch baking pan with parchment paper leaving about an inch hangover on each side.
  • Chop chocolate (or use chips) in a microwave safe bowl with the butter (if using) and the condensed milk.
  • Microwave on high, stirring every minute, for 2-3 minutes.
  • Remove and stir in vanilla and chocolate hazelnut spread
  • Spread in the lined baking pan.
  • Refrigerate for 2 hours or until firm. 
  • Using the parchment paper overhang, lift the fudge out of the pan, and cut into squares.
Serve. 


Wednesday, February 11, 2015

the simple five: slow cooker cheese potato soup


Nothing is better than spending a full day outdoors enjoying winter activities, and then being welcomed to a home filled with comforting aromas indicating that dinner is ready and waiting for you. I love using my slow cooker, and this particular recipe is a nice hearty soup, especially if you're feeding a crowd.  Fun to serve in bread bowls, and perfect to feed a large group or family (maybe for Family Day this weekend?)

This recipe makes a large batch but can be halved if you're not consuming this all in one night. Half can be served right away, and the other half placed in a container (once the soup is cooled) and frozen for up to 3 months. This recipe is quite adaptable, and you can replace the green onions with caramelized onions, roasted garlic, dill or shallots.  I've even used left over Garlic Roasted Cauliflower with good results.

Enjoy!


Slow Cooker Cheese Potato Soup (for a crowd)
(makes approximately12 servings).


Ingredients:
  • 4 cups of stock (chicken, vegetable or beef.... I generally use chicken or vegetable, but have used beef stock when I'm not adding crumbled bacon as a topping).
  • 8-10 russet potatoes, cubed
  • 1 stalk green onion, (thinly sliced green and white parts)
  • 1-2 cups of shredded cheddar cheese (depending on taste).
  • 2+ cups of milk or heavy cream.
Preparation:
  • Place potatoes in an 8 quart crock pot.  Add stock until it just covers the potatoes, approximately 4 cups or so.
  • Add green onion.
  • Cook on low for about 8 hours or high for 4.
  • Turn slow cooker off.
  • Using an immersion blender, puree the contents in the crock pot until it has the consistency of very thick soup (or place contents in batches, in a blender).
  • Add the cheddar cheese and stir until the cheese is melted.  (I used about 1 ½ cups of cheese).
  • Add milk or cream until the soup thickness is to your liking (I use about 2 ½ cups of milk...use more if you want a thinner consistency).
Garnish with sour cream, crumbled bacon, chopped green onions, or dill, if desired.


Wednesday, February 04, 2015

soaking up the sweet


This past week an expected storm resulted in a snow day.  School was closed and the kids were cheerfully home.  We took this extra day as an opportunity to pack, prepare and finalize any school work before our son was going to embark on a snow adventure for an overnight school trip.   

It's amazing what a year of maturity can bring, as he demonstrated by packing his bags wisely, not just according to the weather, but also in an orderly fashion based on his travel habits.  Daily items in an easy access backpack. Extra snow gear at the bottom of the bag.  Everything placed according to how he's accustomed to travelling. After packing, we spent time chatting while shovelling the driveway, then he took a break and basked in the emerging sunshine.  Work is done!


I guess our family trips have surprisingly taught him lessons beyond cultural and geographical ones.  Although I am often frustrated (like any parent has experienced) when he loses or carelessly forgets his belongings, it seems like he has transformed overnight into a young adult....self aware of his own habits and abilities.  

On the morning of his trip, we woke up early to ensure we were prepared. As I anxiously went through his packing list one more time before we left, he smiled his big warm smile and reassured me that everything was "in the bag" (figuratively speaking).  


He was right (and for a brief moment I realized we were having a parent/child role reversal moment). I stopped micromanaging and let him take charge. It's a lesson to remember at times like these, to stop and see his warm smile and like this bread pudding recipe below, soak up as much of his child-like sweetness for as long as I can. For it will not be long before my young boy will be transformed seemingly overnight again, into an amazing, reassuring, sweet young man. 


Apple Crumble Raisin Bread Pudding
(makes approximately 12 servings)


This recipe combines the traditional tastes of bread pudding combined with the sweet as pie tastes of apple crumble on top.

Ingredients
  • 8 slices of raisin bread, cubed
  • 4 eggs
  • 1 ½  cup half and half
  • 1 teaspoon vanilla extract
  • 2 apples, peeled and sliced
For the Crumble topping
  • ½  cup of flour
  • ¼ cup of oats
  • ⅓ cup of brown sugar
  • 1 tsp. cinnamon or nutmeg (to taste)
  • 6 tbsp. butter, cubed.
  • In a small bowl, mix the flour and oats.  Add the sugar and cinnamon. Add the cubed butter, and mix with a pastry cutter or fork until it resembles crumbles (the size of peas).
Preparation
  • Preheat the oven at 350 degrees.
  • In a large bowl, scramble the eggs
  • Add the vanilla and half and half.  Mix well.
  • Add the cubed bread and mix until bread soaks up the egg mixture.
  • Press bread mixture into an 8x8 square pan
  • Layer the sliced apples on top.
  • Sprinkle the crumble topping (recipe below).
  • Cover with aluminum foil.
  • Bake in the oven for 30 minutes.
  • Remove the aluminum foil and bake for 15 minutes more.
Top with ice cream, caramel syrup or enjoy on it's own.


Wednesday, December 10, 2014

shining star


We've been very fortunate to enjoy many holiday celebrations so far...gatherings with friends, stage productions, holiday festivities...taking it all in and enjoying each moment.

Last week, we had the privilege of watching a charming musical production of Cinderella, making it a family-only night of good food and entertainment.  During the intermission, one of the stage managers approached our daughter and asked if she wanted to go on stage to meet Cinderella in front of the live audience. Although my husband and I were enthusiastic and thought it would have been a fun opportunity for her, we didn't want to pressure her into any decisions and allowed her to go with whatever her heart felt.  Although she was flattered by the invitation, she kindly smiled, thanked the young gentleman and declined the offer.


Later that evening, she sensed our curiosity with her decision and as we were driving home, she stated that she really enjoyed kicking back and just watching the show with her family and didn't want to disrupt that time with us just for a few minutes of "performing and be the centre of attention".

Although the lure of the bright lights and audience applause was tempting for her to go on stage, her decision made me proud and amazed at how mature she has become.  She doesn't get easily dazzled or persuaded by what's flashy, but stood her ground with knowing what she felt was important to her at that moment and didn't need false admiration to fulfill her. 

As her parents, we know that the world will be our children's stage, with many more opportunities in the future for both our daughter and son to show how amazing they are. And when that time comes, we know in our hearts, that their star will shine long and bright, beyond any brief spotlight on stage.


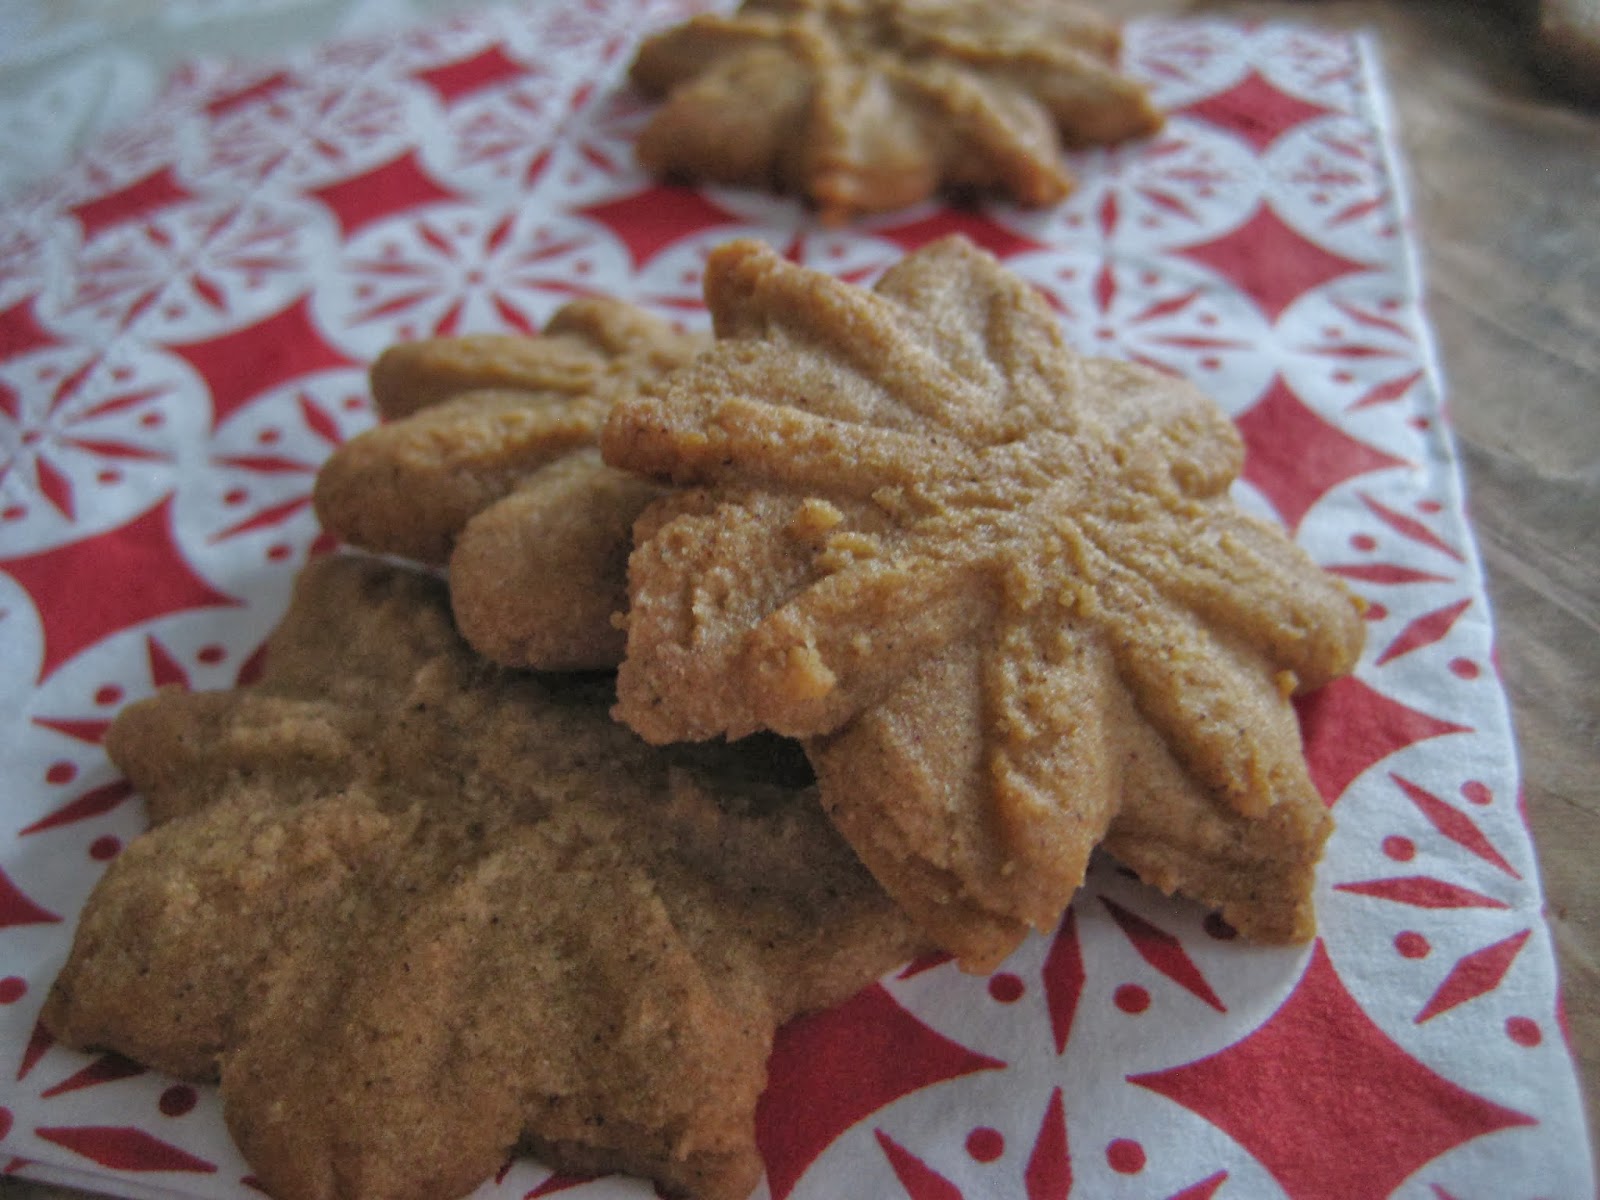
Traditional Gingerbread Cookies
(makes approximately 4 dozen)

This recipe makes a crisp cookie, making it ideal to decorate gingerbread people with icing.  Light, simple and easy.

Ingredients
  • 1/2 cup butter, softened
  • 1/2 cup brown sugar
  • 1 egg
  • 1 tbsp. water
  • 1 1/2 cups unbleached white flour
  • 1/2 tsp. baking soda
  • 1/4 tsp. salt
  • 1 tsp. ground cinnamon
  • 1 ½  tsp. ground ginger
Preparation
  • Preheat the oven to 350degrees F.  Line cookie trays with parchment paper.
  • Cream the butter and sugar together, then add the egg and water, and mix until fluffy.
  • Stir together the dry ingredients:  flour, baking soda, salt, cinnamon and ginger.  
  • Add to the first mixture and beat until the dough is mixed.
  • Shape the dough into 2 equal sized rolls, flour your hands and the work surface, wrap in plastic wrap and chill until firm for at least 30 minutes.
  • Place dough onto a lightly floured surface and roll to a thickness of about ⅓ to ¼  inch (the thicker the better for icing).  Cut out shapes (or put through a cookie press, as I used for the star shaped cookies above) and place about 1 inch apart on the cooking sheet.
  • Make the remaining shapes until all the dough is used.
  • Bake for about 10 minutes until the cookies are lightly browned.
  • Transfer to racks to cool
If you desire, you can decorate with icing.  Recipe found here: Christmas Past

Enjoy!


Friday, November 14, 2014

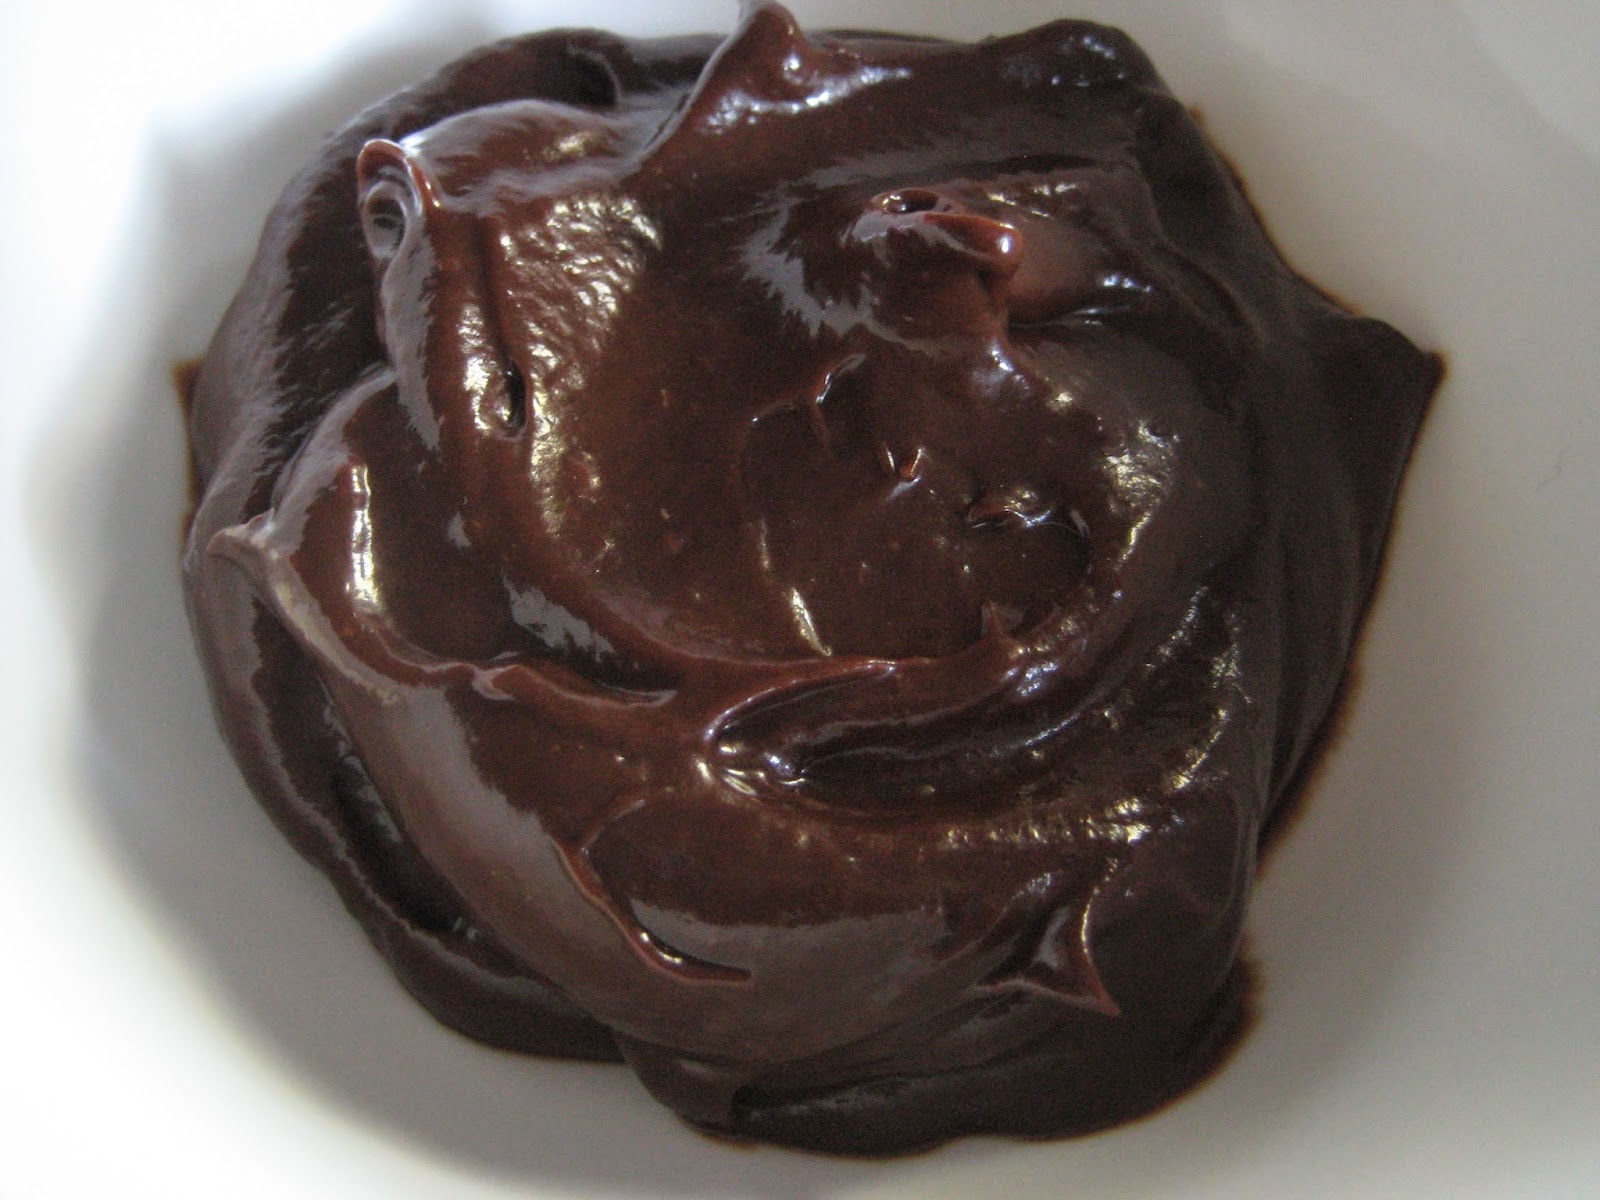
the simple five: chocolate avocado pudding


We love avocado in our house, and I often purchase bags of them for various dishes (my tomato avocado salsa is a house favourite).

Although my intentions are overly hopeful that we will consume all of the avocados in a week, on occasion, I have a few left that are on the cusp of being overripe.  

This simple recipe turns avocado into a sweet and relatively healthy dessert (you won't taste the avocado), and it is quite adaptable.  You can add more cocoa powder for a more intense chocolate taste, or you can add bananas, peanut butter or even apple sauce instead of brown sugar to add interest.  Or just increase the amount of sugar to make it more sweet.  This is a great way to have a chocolate dessert with the added health benefits of avocado.


Chocolate Avocado Pudding 
(makes approximately 4 servings)


Ingredients:
  • 2 avocados, peeled and pitted.
  • 2 tsp. vanilla extract (I also liked using almond extract).
  • 1 tbsp. of brown sugar (alternates: one whole banana , ½ cup of peanut butter, ¼ cup apple sauce.) 
  • ½  cup honey or maple syrup
  • ½ cup Organic cocoa powder (I like using the Camino brand).
Directions:
  • Place all the ingredients into a food processor (I just use a hand immersion blender, with it's blender attachment) and blend until creamy and smooth.  
  • Store in a sealed container for up to 3 days in the refrigerator.
Enjoy.


Friday, November 07, 2014

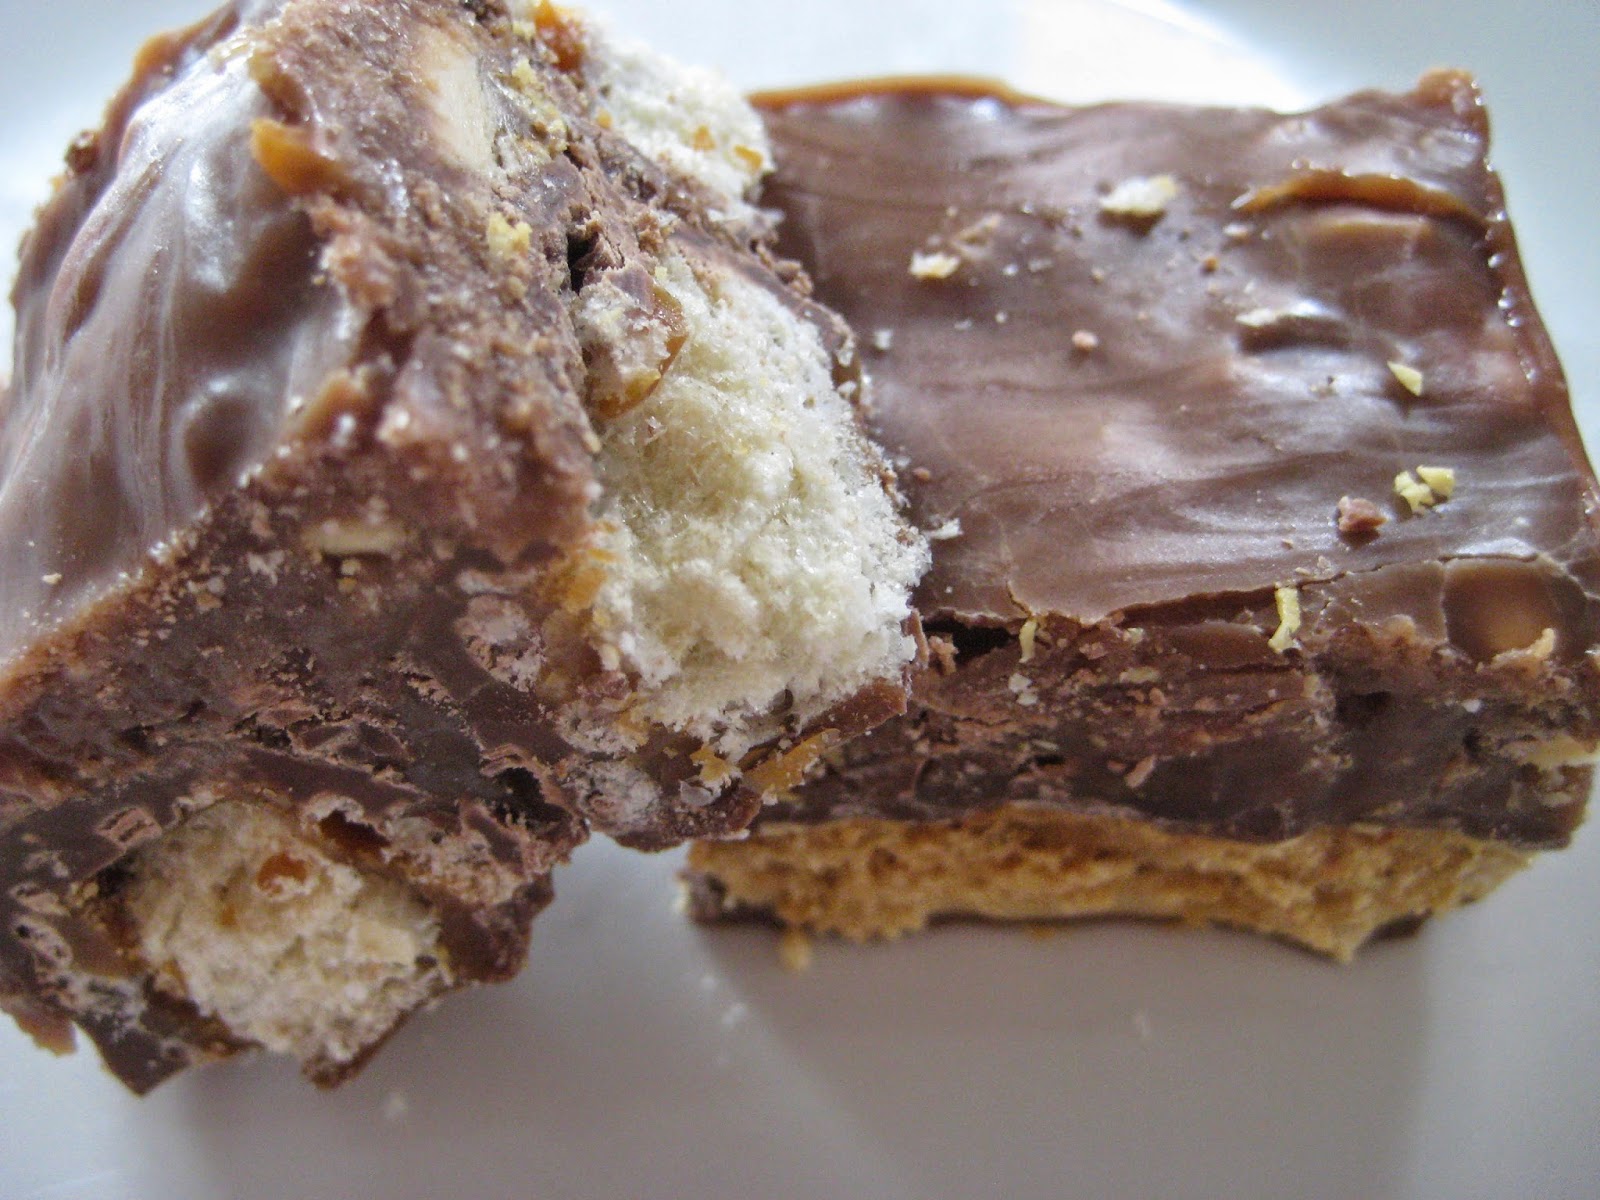
the simple five: candy bowl fudge


This uses up quite a bit of candy, which is ideal for any Halloween left overs (if you have any!).  This is not for the faint of heart or for those watching their calorie intake. It is very sweet. Although this will not lower your sugar intake, you can slow down the rapid consumption (by freezing this for later), and find less mini-wrappers tucked in secret places in your furniture...


Candy Bowl Fudge
(makes about 8-12 servings).
{fudge pictured on the left has Mr. Big bars for the bottom layer,
fudge pictured on the right has Crispy Crunch bars for the bottom layer.}


Ingredients:

Bottom layer
  • Approximately 32 mini chocolates (those with a cookie or peanut centre work well...Crispy Crunch, Mr. Big, KitKat).

Fudge
  • 2 cups plain chocolate (about 26 mini bars...I used Caramilk & Aero bar)
  • 1 can sweetened condensed milk
  • 2 tsp. vanilla
  •  ½ cup chopped walnuts (or substitute with chopped bars with nuts...I used 6 mini snickers bars, chopped).  You can also use chopped Smarties or any candy coated chocolates.
Directions:
  • Line a 8x8 pan with parchment paper, leaving about a 1" overhang from the edges of the pan.
  • Take bars and line the bottom of the pan. (You can make them all uniform or vary the kind you use.  Half of my pan was was lined with Crispy Crunch, the other half, Mr. Big. (KitKat would work lovely too...unfortunately those were all eaten by the time I made this!).
  • Chop plain chocolate (Caramilk/Aero) and place in microwave safe bowl with condensed milk.
  • Microwave on hight stirring twice until chocolate is soft, 2 minutes.  Remove and stir well.
  • Stir in vanilla and chopped walnuts (bars with nuts).
  • While hot, pour over the lined pan of chocolate.  
  • Refrigerate for 2 hours or until firm.
  • Using the parchment paper, lift the whole fudge out of the pan and cut into 1" squares.
  • Fudge stored at room temperature in an airtight container will last up to 10 days. Fudge stored in the refrigerator can last 2 to 3 weeks. (or 3 months in the freezer in an airtight container).
Go to the dentist.


Wednesday, October 22, 2014

bark loudly


A little while back, my son had a few friends over to play video games, throw the ball around at the park and just hang out.  Unfortunately with a last minute cancellation, our daughter's original plan to spend the day with a friend didn't materialize.  She was very disappointed.

It is no secret in our house that our little girl loves anything sweet. As if she's not sweet enough! So while the boys played, I promised her that we'd make some kind of candy to pass the time.  Just the two of us. As I was saying this, I wished I stopped myself from making this promise as I didn't want her to be disappointed (again). How am I going to make candy? I don't have any ingredients unless we made caramel sauce (but no ice cream to top it with) or fudge ("not interested" she said).


All of a sudden, our dog started barking loudly (and for no reason...bird? squirrel?).  The continuous yelping at small critters usually bothers me, but for some reason it felt like our pup was trying to tell us something, giving me a great idea. Throughout the continuous barking, I told our daughter that our pup was suggesting that we make "bark", and with her eyes widening with enthusiasm, she gave an astounding "yes" and hugged our dog in appreciation for the good idea. Our dog finally stopped barking.

Since I usually don't make bark unless it's Christmas, I had forgotten how quickly and easily one can have such sweet goodness in a few hours.  I just used what I had on hand...a half a package of semi-sweet baker's chocolate, half a bag of white chocolate chips and half a bag of toffee bits.


Our little girl had the greatest time watching the different coloured chocolate mix together, creating a beautiful marbled look.  Her sadness with the cancelled playdate quickly dissolved as she licked the bowls clean. She had the biggest, stickiest smile on her face.

I guess we had a sweet day after all and maybe I should thank our pup...


...for barking loudly.


Marble Chocolate Toffee Bark
(Makes enough to serve about 4-6 people).

This is the easiest and quickest chocolate bark. Ever.  Not sure if this really constitutes as a recipe, but here we go.

Ingredients
  • 4 squares of Baker's Semi-Sweet Baker's Chocolate
  • 1 cup of white chocolate chips
  • ½ cup of toffee bits, plus more to top (I used the "Skor" brand, but you can use any kind of candy you have on hand).
Directions
  • In two separate small bowl, place the baker's chocolate in one bowl and the white chocolate chips in the other.
  • Set your microwave at 50% (medium) and melt the chocolate for about 2 minutes.
  • Remove and stir quickly.  If it's not melted, then put the bowls in the microwave and melt again at 50% for another minute.
  • Remove.  In the bowl with the baker's chocolate, stir in the toffee bits.
  • On a baking sheet, place parchment paper.
  • Spread the white melted chocolate on the parchment paper.
  • Spread the baker's chocolate on top.  Using the spoon, swirl the two chocolate together.
  • Top with a few more toffee bits (optional), to taste.
  • Place the cookie sheet in the fridge for at least 3 hours.
  • When the chocolate has hardened, break into pieces (you don't have to be precise...it looks better when you just cut it any way you wish).
  • Keep in a sealed container, in a fridge for up to 5 days.

Enjoy!


Wednesday, October 15, 2014

sweeter than pie


As kids get older, the life lessons they learn tend to get a little more complicated, tasting more sour than sweet. More than ever, it becomes increasingly difficult to stand aside as our children work out their own inner turmoil and unravel the mysteries of life without parental interference. As parents, we spend so much time building our children's wings that we forget to let them try on their own to fly.

Amongst Thanksgiving and birthday celebrations, our son has eagerly anticipated two significant sporting events: a cross country running race and his first swim meet this week. Along with honour band rehearsals, reading assignments, running and swim practices, on top of his regular school work and social life, he's had a lot to manage.

On the morning of his cross country race, our son was extremely anxious and worried that the increased distance he had to run this year (an extra kilometre!) would dampen his chances of doing well and earning a place at the next regional race (only the top 15 get to go). As scenarios began to run in his mind, he started to question his decision to enter the race to begin with, and my witty sweet boy became extremely silent, as if he was transported elsewhere.


We persevered with the morning routine and like a true athlete he became laser focused once we arrived at the running track. Before his race, very few words were spoken as he walked off on his own and collected his thoughts around the track. Although he was able to see and catch up with his friends from other schools, for the most part, he walked to clear his mind and get ready for the event.  Then it was time to gather at the starting line. As tempting as it was to give him one big hug before the race, I stayed behind, standing at the bleachers to give him the space he needed.

When his category began their race, in the distance I could see him run amongst the pack of about fifty kids-with-much-longer-legs-than-him. He held back and for the longest time was in 12th place.  My heart started to sink as it was now my turn to run scenarios in my mind about what he was thinking. Did he lose his motivation?  Is he tired?  Did I feed him too much/too little this morning?


The group was out of sight on the other side of the tracks, and for about what felt like forever ten minutes I didn't know where he was in the race. Did he fall behind? Did he go ahead? Did he stop?

Then I saw the lead runner cross the finish line. Then another. Then a group of five boys appeared around the corner, one of which was my son. As his running coach came to stand beside me with a smile and a "where-did-he-come-from" look, we watched as my son crossed the finish line in the top five! His face lit up like the sun.


On the drive home, he was still quite silent. His body was in pain from over-exertion and he closed his eyes to rest. Once we got home, I could tell he was replaying the race in his mind and with a big sleepy smile proclaimed "It was the best race I've ever ran. I really had to work hard and I'm proud that I was able to still finish strong. I'm totally pumped for my swim race this weekend".

It was at that very moment when I saw a different kind of maturity in him.  His accomplishment at the race taught him that all his hard work paid off because he stayed determined, focused on pushing through the jitters, trusted his own abilities then put his best foot forward.

This young gentleman is learning to fly on his own...


..and learning that lesson is so much sweeter than any possible gold medal or dessert he'll ever have.


Sweet Apple Galette
(makes two galettes, serves approximately 6-8 people).


Like apple pies, you can make this (without baking it), and FREEZE this. You can also make this a day ahead if kept in a container and refrigerated.  If baked from frozen, then bake for about 10 minutes longer, and make sure you use an egg wash on the crust to prevent burning (I also use the pie crust edge shield for this). The caramel filling makes this galette fairly sweet.

Ingredients
  • 8-10 medium sized apples, peeled and thinly sliced
Crust
  • 3 cups of all purpose flour
  • ½  cup butter
  • 2 ½ cup vegetable shortening
  • ½ tsp. salt
  • ½ cup of ice cold water
Caramel Filling
  • 3/4 to 1 cup brown sugar
  • 6 tbsp. flour
  • 1 ½  cup brown sugar
  • ½ cup of water
  • 1 tsp. ground cinnamon
  • Pinch of nuteg
  • ½ tsp. allspice
Whipped cream, if desired

Preparation

Make the crust first.
  • Whisk the flour and salt together.
  • With a pastry blender, cut the butter and shortening until the mixture looks like pea sized crumbs.
  • Drizzle the water slowly over the flour until mixed.
  • Form the dough into a ball and refrigerate (for at least 30 minutes...you can do the apples and caramel in the meantime.)
Peel and slice the apples and set aside.

Make the caramel.
  • Melt the butter in a large sauce pan
  • Stir in flour to form a paste.
  • Add sugar, then water and bring to a boil
  • Remove from heat and add the spices, continually stirring.
  • Toss the apples into pan of caramel sauce, until evenly coated.
Assemble:
  • Roll out the crust dough into two round discs onto parchment paper, approximately 1" thick (and approximately 12" in diameter).  
  • Place the rolled out dough into two pie dishes.
  • Put half of the apple mixture into the centre of each of the pie crusts, leaving a one inch edge.
  • Fold the edges towards the centre.  You don't have to be neat...it looks more rustic if it's not perfect!  Or tuck the edges in for a more neater presentation.
  • At this point, you can wrap with the parchment paper, and refrigerate (or freeze).
  • When ready to bake, remove the galettes off the parchment paper and back into the pie dishes.  (You can place on a silpat and then on a baking pan, but this way if there is any spillage from the apples, it the crust will remain it's form.
  • Brush a little milk onto the crust.
  • Bake at 400 degrees for 35-40 minutes (or 45 minutes if frozen), until golden brown
Serve warm or room temperature, with whipped cream or vanilla ice cream.


Wednesday, October 08, 2014

pockets of gratitude


While busily driving around the city to do errands the other day, I saw a chicken cross the road.  There are no farms in the area (so I have no idea where this chicken came from) and many cars had stopped traffic to let it cross, as if this was commonplace. I guess we Canadians are familiar with poultry crossings, as we similarly allow flocks of Canada Geese to cross the road when necessary.  Amongst the ever growing list of the things I had to do that day, the thought about that age old joke about chickens and roads distracted me long enough to realize how funny it was to actually see a chicken cross the road, and I couldn't stop laughing in the car all the way to my next destination.

With Thanksgiving this weekend, the holiday makes us think of all the things we're thankful for. It's one of my favourite holidays of the year. A gathering of loved ones, sharing the coziness of a hot, deep-sleep inducing meal and spending time creating familiar memories.  I say familiar, because I usually cook the same menu, and ask my guests to bring the same food item year after year.  The familiarity of this tradition provides the comfort of consistency. 


However, I've been thinking a lot lately about gratitude. Maybe we should really be more grateful, taking note of perhaps the small but accumulatively important things that we have in our lives.    Being grateful allows us to slow down and really take notice of what is staring us in the face, every single day.  Like watching beautiful sleepy faces in the quiet of the night. Or the glorious sunshine warming our earth. Or the beauty of mature trees reflected on a calm, still pond.

Being thankful requires a giver and receiver, where we owe that moment, or gift, to someone else for providing it. I'm sure that chicken is thankful that all those cars stopped to let it cross the road.  But being grateful allows you to feel the warmth of happiness at any moment within yourself without waiting to be thankful for something given to you by someone else.


So this year, I'm going to try to be more grateful. Yes, I'll still be thankful for the delicious food on our table. Thankful for being able to spend time with family and loved ones. Thankful for the time off of work to be able to enjoy all those things. But I'll also acknowledge the simple little moments. Grateful for restful children that allow me a few extra hours in the morning so I can prepare for the feast. Grateful for beautiful weather so the commute to our home is safe and enjoyable.

And on an otherwise busy and hectic day, grateful for catching that funny glimpse of that chicken crossing the road and putting a big smile on my face.


Happy Thanksgiving


Turkey Pockets
Serves 4-6 people


This is a great recipe for using left over turkey from Thanksgiving.  You could also use chicken instead (for other times of the year).

Ingredients
  • 2 or 3 cups of cooked turkey, diced. 
  • 1 and ½ tablespoon unsalted butter
  • 2 tablespoon all purpose flour (optional)
  • ½ teaspoon black pepper
  • ½ cup Corn and peas (optional)
  • ½ cup milk (you may need 1 - 2 tablespoons more)
  • ½ teaspoon Herb de Provence 
  • ½ teaspoon Poultry seasoning (optional)
  • Puff pastry sheets (1 used 10 pastry squares - 6 x 6 inch)
  • 1 egg, lightly beaten
Directions
  • Heat a saute pan with the butter until melted, add corn & peas until cooked.  
  • Add the flour, black pepper. Whisk to mix everything and let cook for 2 minutes. 
  • Add half the milk, then all of the turkey, then the remaining milk. 
  • Cook for a 3 - 4 minutes until the milk reduces. 
  • If the mixture is too dry add 1 - 2 more tablespoons of milk. 
  • Season with Herb de provence or poultry seasoning (or both)
  • Let cool completely.

To prepare the puff pastry shell:
  • Defrost puff pastry shells at room temperature for 30 minutes. Cut squares into triangles, fill one side with 1 tablespoon of mixture. 
  • Fold 1 side of the pastry over the filling and crimp the two sides with a fork. 
  • Repeat with remaining shells. If baking right away, brush pastries with lightly beaten egg.
  • Line the pastries on a parchment lined baking sheet and bake at 350 degrees F for 15 - 20 minutes or until pastries turn lightly golden brown. 
Enjoy.


Thursday, September 04, 2014

roll with it


As the kids return to school, I start thinking of packing some of their summer clothes away.  However, we finally are having a summer heatwave, so I'm holding off that ritual, just in case we can squeeze more "summer fun" into the next couple of weekends.

It was that kind of summer.  Examining the weather to determine if we were heading to the beach or for a bike ride that day.  We just rolled with it, and made the best of the weather during our family time together, doing our summer rituals:  going back to our old haunts (riding the bike trails, diving off the pier at the waterfront near our cottage, motorbiking) and trying out new excursions (this year was horseback riding and going to the theme park).  We did everything but spend a hot sticky day at the beach.


The sun was scheduled to make one last appearance less than a week before school began, and on a whim, I was able to take the kids for one big day at the beach (without my husband...he had a previous engagement). It was a beautiful day.  We did everything we could on that short and sunny day.  We swam, surfed, built sandcastles, played frisbee and football, went to the arcade, the candy store, had Beavertails, and went for a long walk in the early evening, ending it with a picnic on the beach for quick dinner, watching the sunset.  Phew!  It was like we tried to cram a summer time of beach fun into one day.


Watching the sunset, I felt this is what being a parent should really be about.  Fill the days with as much love and memories.  Although going to the beach is one of our summer rituals, we didn't realize how much this really meant to us until we we were unable to go together as a whole family.


It's this ritual, the familiarity of it, that provides comfort...not only to children but to adults as well.  We really felt it on that sunny day at the beach.  Although we sent pictures and texts during our stay to make my husband feel a little more included, it still felt strange and incomplete without him there.  It's not only about where we go that make the memories, but the people we spend it with.


It did make the kids realize how much they still like their parents to be around, even though they're at the age where they wouldn't readily admit it.  Although our beach day didn't feel quite complete, I'm glad we we allowed the sun shine to brightly guide us.  That day, we really learned to appreciate the ability to take advantage of opportunities when the sun does rise...


...but more importantly, to also appreciate those who couldn't be there when it did.


Easy Pizza Dough Cinnamon Roll Waffles
Adapted from: Mario Batali
(makes approximately 8 servings)


I was inspired by the pictures on Pinterest using pre-made cinnamon rolls in a can for waffles, but with the controversy of the ingredients in canned dough, I remembered an adapted cinnamon roll recipe using pizza dough.  Instead of waiting for it to bake in the oven, the time was cut in half by turning these rolls into waffles using a waffle iron/maker,   You can use a panini press (or go the traditional route, and bake in the oven).


Ingredients:
  • 750g pizza dough  (or about 1 ½ pound)
  • ¼ cup melted butter (6-8 tbsp.)
  • 3 tbsp. white sugar
  • 3 tbsp. brown sugar
  • 1 tablespoons cinnamon
  • Flour, for dusting
Simple tip:  It's best to leave out your pizza dough on the counter to room temperature for approximately 30 minutes prior to rolling out (this would make it easier to roll it out thinly)

Preparation
  • Heat the waffle iron (or if you're baking this for buns, preheat oven to 375 degrees).
  • Using a rolling pin, roll out the pizza until it is about ¼ inches thick.  
  • Using a pastry brush, brush the melted butter on top of the dough.
  • Mix the white sugar, brown sugar and cinnamon together.
  • Sprinkle the cinnamon sugar mixture on top of the melted butter.
  • Roll the dough until it looks like a jelly roll.


  • Using a sharp knife, cut into 1" slices.
  • Place the slices on waffle iron, and cook for approximately 2-3 minutes, depending on how hot your iron gets (or place in a greased cake pan and bake for about 40 minutes.)

Serve and enjoy.


Thursday, July 31, 2014

a midsummer dream


During my high school and university years, I was fortunate to spend my summers simultaneously working part time jobs to support my education AND attending one or two English literature/creative writing classes for extra school credits.  Back then, I looked at summer time as an opportunity to experiment and explore...taking jobs that were not in my realm of studies but peeked my curiosities (fashion) and classes that honed my writing skills (studying Shakespeare and Chauncer to fill my summer reading requirements).

You can say I had a lot of drive and was a bit of a keener.  Even though I had a few weeks of vacation to relax at the beach with my family or friends, for the most part, summer was a time to transform myself.  There were times when I actually looked forward to going back to school just so I can show how far I've grown and what I've proudly accomplished while others were working on their tan.


A bit of that feeling still carries with me today.  As we approach midway through a busy summer of trips, cottage and swim camps, I still have that slight nagging feeling like we haven't accomplished enough.  What have we learned this summer? What have we done?

As I ponder these thoughts, I look at how my kids glow in the pleasures of being outside splashing in the water, or how windblown crazy their hair get after a ride on their motor bikes, or the dirt accumulated under their fingernails from playing in the yard.  Yes, they still continue to upkeep their reading and arithmetic skills, and have accomplished graduating to higher levels with their swimming programs, but their greatest accomplishment this summer is making lasting memories that we too, created when we were kids. Cultivating new interests (like diving), visiting new places and meeting new friends without the pressure of schedules or competition.


As adults we have created a society that now suffers from decision fatigue and I think many of us long for those summer moments when we laid on the grass doing nothing but pointing out shapes made by the clouds. Or skipping rocks along the water.  A simpler time.  


I think there is plenty of time for our kids to grow up, when they too, will be inundated with overwhelming choices and decisions to make. Until then, I'll squash all those nagging feelings I've been having and appreciate that my dreams for this summer have already been realized...each day being with my family has been such a joy and gift...


...and we're barely half way there.

Parmesan Crusted Tilapia
Makes 4-6 servings


After weeks of indulging and consuming lots of BBQ meat, it's nice to occasionally switch to lighter fare to break the summer menu.  This recipe is great for those quick dinners that are light but still fulfilling...on those nights when you'd rather enjoy the beautiful outdoors than spending it sweating in the kitchen or over a hot BBQ.

Ingredients
  • ½ cup parmesan cheese
  • ¼ cup bread crumbs
  • ¼ cup of butter, softened
  • ¼ cup of mayonnaise
  • 1 tsp. thyme
  • 1 garlic clove, minced
  • Black of white pepper (to taste)
  • 4 fillets of tilapia (or any white fish of your choosing)
Directions:
  • Preheat the oven to 400 degrees
  • Add parmesan, bread crumbs and mayonnaise to the butter until well mixed.
  • Gently stir in the garlic, thyme and pepper.
  • Place the tilapia fillets in a single layer on a baking sheet.
  • Top with the parmesan crumb mixture.
  • Bake in the oven for 20 minutes or until the fish is cooked. (if you wish, you can broil the fish for about 1 minute to toast the crumb topping.
  • Serve (with rice or sweet potatoes).
Enjoy!